
Aeronautics: Fly by Instruments
Turn your Create airship into a fully equipped flight deck: monitor altitude and terrain, wire custom avionics, coordinate modular warning tables, and automate cockpit systems with ComputerCraft.
截图

介绍
An addon for Create Aeronautics

Flying a Create Aeronautics ship is great until a mountain shows up out of the fog,
or you try to land and have no idea how far the ground still is. Fly by Instruments
adds avionics: sensor blocks you mount on your craft that measure the world around it
and turn what they see into redstone signals and CC:Tweaked data.
Wire them into a lamp, a bell, a Create contraption or your own flight computer, and
your ship can warn you, or react on its own, before you hit something.
Every sensor works on a moving ship as well as on the ground. It turns and tilts with
your ship, never mistakes your own hull for an obstacle, and spots terrain, buildings
and other ships alike.
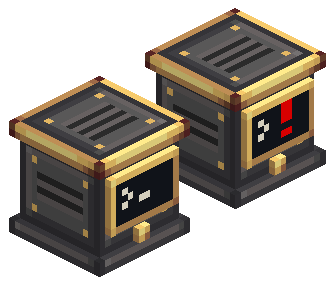
Want a real cockpit? The avionics suite adds an Avionics Computer that
turns your sensors into a ground proximity warning system, a Modular Table for warning
lamps, buzzers and a flight management system, and wires to tie it all together.

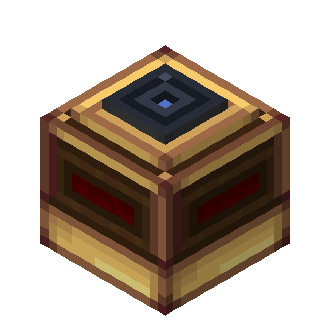
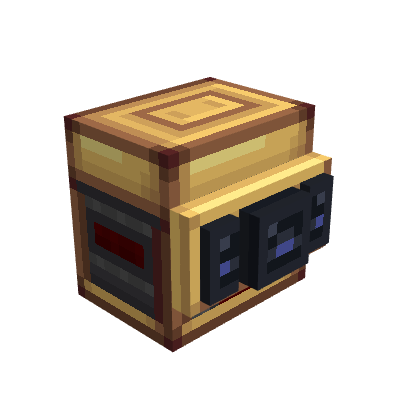
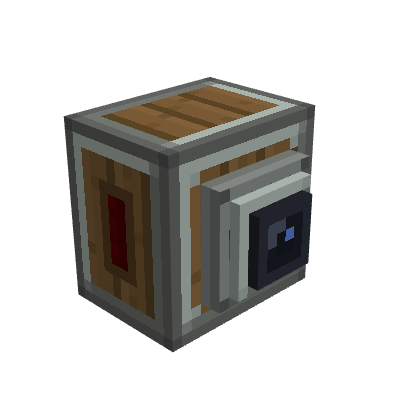
Three sensor blocks, each with a different job and each recognizable at a glance.
Radar Altimeter
Tells you how high you are above whatever is below you. Mount it with the glass lens
facing down and it keeps track of the ground under your ship, without being fooled by a
lone tree or lamp post.
- The higher you fly, the stronger the signal. You choose the altitudes where it starts
and where it maxes out: a landing light that dims as you touch down, an alarm when you
drop below your cruise floor, whatever you need. - Sees up to 128 blocks down.
Terrain Scanner
Watches what’s ahead of you. Point the nozzle where you’re going and it keeps an eye
on everything in front of the ship.
- The closer the obstacle, the stronger the signal. You choose how far out it starts
warning you and how close is “too close”. Nothing ahead, no signal. - The signal comes out of every side, so it’s easy to wire.
- Works mounted on a ceiling too. It still looks forward.
Advanced Terrain Scanner
Watches ahead and to the sides, separately. Three lenses for three directions:
Front, Left and Right, each with its own warning distance and its own signal.
- Widen or narrow its view, from a tight beam straight ahead to a half-circle sweep.
- Each direction has its own side of the block: front from the front, left and right from
the sides. Wire “obstacle left” and “obstacle right” to different lamps, bells or
steering. - Left and right only wake up once the view is wide enough to see them.
- Crafted by upgrading a regular Terrain Scanner.
The avionics suite
The avionics suite is craftable. The Network Bridge remains Experimental and creative-only.
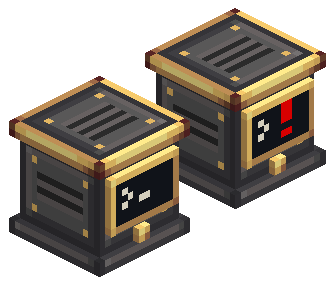
Avionics Computer
A ground proximity warning system for your ship. Connect it to your sensors and it
watches them all, then warns you before you fly into trouble.
- Warns about terrain ahead, pull up, a fast descent, losing height after
takeoff, flying too low and banking too steeply. - Set it up once, then it just works: no arming, no thresholds to tune. Pick a
sensitivity and switch off the functions you don’t want. - A small screen on the front blinks amber or red with the alert. Press its button for a
self-test.
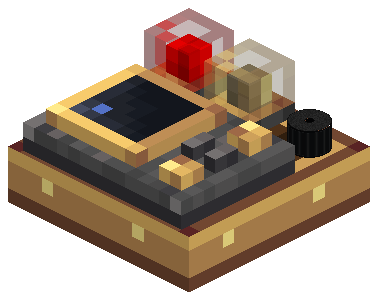
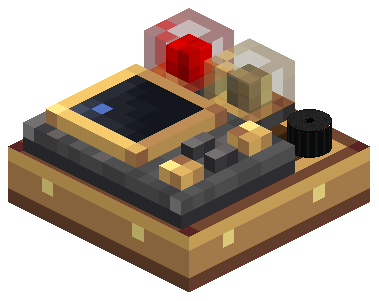
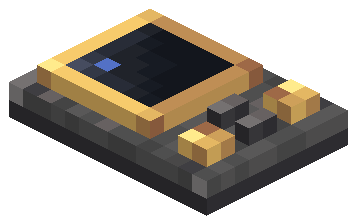
Modular Table
Your cockpit panel. A brass-and-wood slab with a 3 × 3 grid where you install modules.
- Warning lamps (1×1 and 2×1, red or amber) and a buzzer show the computer’s
alerts. Click a lit lamp or a sounding buzzer to silence the alarm, like a Master Warning. - The FMS module stores waypoints and shows a compass to the selected one. Link an
FMS Compass to it and an Aeronautics Navigation Table follows your route. - Tables placed side by side join into one big panel. A table mounted straight on the
Avionics Computer is connected to it with no wire at all.
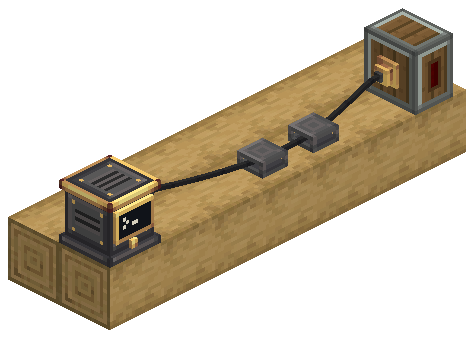
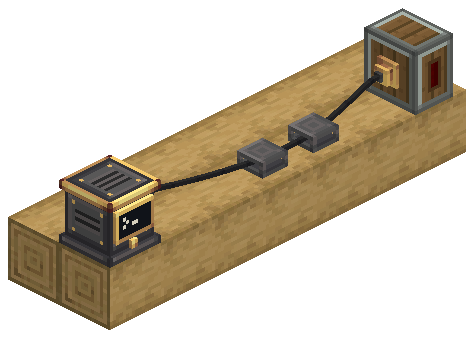
Avionics Wire
Real wires, not blocks. Mount brass Wire Connectors on your devices and iron
Wire Supports along the hull, then run a black wire through them.
- The wire hangs with a gentle sag and bends neatly through each support.
- A ghost wire shows you the path, the length and the cost before you click.
- Press V for the Wiring View: every wire shows through the hull, coloured by
whether its network is working.

With PonderJS, KubeJS and Rhino installed on your client, hold W over a supported item for an animated tutorial. The eleven Ponder tutorials cover sensors, wiring, cockpit panels and FMS navigation in English and Brazilian Portuguese.
Right-click a sensor to open its output screen.
- Range slider: drag the two handles to set where the output starts and where it
reaches its maximum. The caption tells you exactly what you’ll get, for example
“15 at 4 m → 0 at 32 m” (1 block = 1 m). - Block faces: by default, the signal comes straight out of the sensor. Put redstone,
a lamp or a Create component next to it and you’re done. - Redstone Link: fill both frequency slots of a channel and that channel is broadcast
through Create’s Redstone Link instead. Your sensor can sit on the hull while the
receiver sits in the cockpit. Pick frequency items without consuming them, straight
from your inventory (or drag from JEI). The screen shows each channel’s state: Block
faces, Via Link or Incomplete pair. - Advanced Scanner: use the Front / Left / Right tabs to give each channel its own
range and frequencies, and the Aperture slider to set the opening.
Heads up: on the Advanced Scanner, once one channel uses Redstone Link, the whole
sensor switches to Link. Give every channel you want to use a frequency pair.
Setting up the avionics suite:
- Place an Avionics Computer and connect it to a Radar Altimeter (required) and any
Terrain Scanners with Avionics Wire. - Open each Terrain Scanner and set Looks at to the side of the ship it watches.
- Mount a Modular Table and install lamps and a buzzer. They show the computer’s
alerts right away.
Heads up: the computer never guesses which way a scanner faces. A Terrain Scanner
without a Looks at side does not count as looking ahead.
Sensors can’t see into unloaded chunks. A beam that reaches one simply doesn’t count,
so very long ranges near the edge of the loaded world may read less than you expect.

Every sensor is a CC:Tweaked peripheral of its own. Put a computer next to it, or
connect it with a wired modem, and read the raw data:
| Peripheral | Readings | Events |
|---|---|---|
radar_altimeter |
getReading(): status and altitude in blocks |
radar_altimeter_reading_changed |
terrain_scanner |
getScan(): every contact, with distance and direction |
terrain_scanner_scan_changed |
terrain_scanner_advanced |
Same as above, plus getConfiguration() and setOpeningAngle(degrees) |
Same as above, plus terrain_scanner_configuration_changed |
avionics_computer |
getStatus(), getSensors(), getAlerts(), plus sensitivity, inhibit and self-test |
avionics_alert_changed, avionics_status_changed, avionics_sensors_changed |
modular_table |
Installed modules, lamp and buzzer indications, FMS waypoints | modular_table_changed, modular_table_alert_outputs_changed |
All three also expose their redstone setup: getOutputs(), getOutputConfiguration(),
setOutputRange(channel, min, max) and setLinkFrequencies(channel, first, second).
local altimeter = peripheral.find("radar_altimeter")

while true do
  local _, _, reading = os.pullEvent("radar_altimeter_reading_changed")
  if reading.status == "valid" and reading.value < 6 then
    print("TOO LOW! " .. math.floor(reading.value) .. " m")
  end
end
Full API reference: Radar Altimeter ·
Terrain Scanners ·
Computer Craft API and Lua examples.
Browse the online guide for the sensors, the Avionics Computer, the Modular Table and the Avionics Wire.

Yes. These server config options apply to every sensor in the world:
| Option | Default | What it does |
|---|---|---|
radarAltimeterMaxRange |
128 | Maximum altimeter range, in blocks (1–4096) |
terrainScannerMaxRange |
128 | Maximum scanner range, in blocks (1–4096) |
sensorScanIntervalTicks |
5 | How often sensors take a new sample, in ticks |
Longer ranges and shorter intervals cost more server time on big fleets.
For the avionics suite:
| Option | Default | What it does |
|---|---|---|
maxAvionicsNetworkBlocks |
4096 | Largest avionics network, in connectors and devices |
wireMaxSpan |
24 | Longest wire span between two points, in blocks |
wireMaxPoints |
32 | Points per wire, ends included |
wireBlocksPerItem |
8 | Blocks of wire made by one Avionics Wire item |
lampLightLevel |
5 | Light given off by a lit table lamp (0 turns it off) |

- Minecraft 1.21.1 with NeoForge 21.1.236 or newer
- Create 6.0.10+
- Create Aeronautics 1.3+ (bundled)
- Sable 2.0.5
- CC:Tweaked 1.120.0+
- R-UI Lib 0.8.0+
The Avionics Network Bridge remains Experimental and creative-only. See the documentation for setup and usage.

Open an issue on GitHub.
Your Minecraft version, the mod versions and a description of what happened help a lot.
A screenshot of your redstone setup helps even more.

Yes, go ahead! Fly by Instruments is released under the MIT License. A link back
to this page is appreciated.
Getting started: player guide. References: Computer Craft API and examples · sensors · all guides. Development setup: source guide. What changed in each version: CHANGELOG.
常见问题
Aeronautics: Fly by Instruments 支持哪些 Minecraft 版本?
Aeronautics: Fly by Instruments 支持 Minecraft Java 版 1.21.1,可用的加载器:NeoForge。下载时注意选择和你游戏版本一致的文件。
Aeronautics: Fly by Instruments 怎么安装?
先用 PCL2 或 HMCL 启动器安装对应版本的 NeoForge,再把下载的 .jar 文件放进游戏目录的 mods 文件夹,重新启动游戏即可。开启了版本隔离的,mods 文件夹在 versions/版本名 下面。
radaeli 的其他作品
查看全部 →
Create: Copycat Replace!
Replace a Copycat's material in a single click - Work with connected blocks and supports Copycats+
Sophisticated Backpacks: Digital Storage Expansion (AE2, RS, SCC)
Connect your Sophisticated Backpack to your digital storage! Supports Applied Energistics 2 (AE2), Refined Storage (RS), Super Cool Calculator (SCC), and Tom's Simple Storage.

[DEPRECATED] – Create: Stock Market – Updated Numismatics
DEPRECATED - Use the official mod - This one is gonna be deleted soon.
Simply Light: Smart!
An addon for Simply Light that adds redstone-dimmable lights and Smart Switch controls for linked lighting networks.
评论
登录后评论和评分