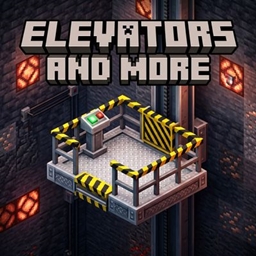
Elevators and More
Elevators and More brings heavy-duty, realistic, multi-floor industrial elevators and travel utilities into Minecraft
介绍
Elevators and More
Elevators and More brings heavy-duty, realistic, multi-floor industrial elevators and travel utilities into Minecraft 26.3 with smooth entity movement and custom platform building!
Tired of simple instant-teleport elevators? Elevators and More lets you construct true dynamic elevator platforms with physical rails, wall call stations, onboard control pedestals, safety railings, and realistic mechanical sound effects.
🛗 Features at a Glance
- 🏗️ Custom Platform Footprint: Build platforms of any shape and size up to 49 blocks (configurable up to 121 blocks) using
Industrial Elevator Floorblocks. - 🚡 Smooth Moving Carriages: Platforms smoothly turn into physical entities while in motion with collision and camera interpolation—no jittering or clipping through the floor!
- 📶 Multi-Floor Shafts: Place
Industrial Guide Railsvertically from bedrock all the way to build height (up to 384+ blocks). - 🎛️ Elevator Control Boards (Landings):
- Place control boards at each floor level.
- Automatically discovers floors along the vertical shaft.
- Includes a
DOCKEDindicator light so you know when the carriage is ready. - Call the elevator directly to your floor or send it anywhere.
- Rename floor stops (e.g. "Deepslate Quarry", "Basement Storage", "Penthouse").
- 🕹️ Onboard Control Pedestal:
- Install a control column right on your moving platform.
- Select your destination floor mid-ride or slam the Emergency Stop button if something is blocking your way.
- 🚧 Industrial Safety Railings: Keep your passengers, pets, and cargo securely on the platform.
- 🔊 Atmospheric Audio: Mechanical gear sounds, motor hums, and solid iron docking clunks when arriving at a floor.
📖 Quick Start Guide
Step 1: Guide Rail Column
Place a vertical column of Industrial Guide Rails along the wall of your elevator shaft from bottom to top.
Step 2: Build the Elevator Platform
At your desired starting level, construct the floor of your platform using Industrial Elevator Floor blocks touching or adjacent to the Guide Rail. Add Industrial Safety Railings around the perimeter and place an Elevator Control Pedestal on the floor so you can operate it from inside.
Step 3: Install Floor Landing Boards
On each floor where you want the elevator to stop, mount an Elevator Control Board on the wall within 2 blocks of the platform edge.
Step 4: Configure & Ride!
Right-click your Control Board or Pedestal to open the custom GUI:
- Rename the floor station if desired (e.g. "Floor 1 – Base").
- Press Call Elevator Here to bring the platform to your level.
- Step aboard, open the pedestal interface, choose your destination, and hit Go!
🔨 Crafting Recipes
- Industrial Guide Rail (x6): 2 columns of Iron Ingots sandwiching Iron Bars in the middle.
- Industrial Elevator Floor (x4): 4 Iron Ingots cross-pattern around Smooth Stone.
- Industrial Safety Railing (x6): 3 Iron Bars along top, 2 Yellow Dye below.
- Elevator Control Board (x2): Stone Button flanked by Redstone Torches, with Iron Ingots top and bottom.
- Elevator Control Pedestal (x1): Stone Button on top, Redstone in the middle, Iron Ingot on bottom.
⚙️ Configuration Options
Server admins and pack makers can configure the following in the config file:
maxPlatformBlocks: Maximum number of platform floor blocks (Default:49, Max:121).maxHorizontalSpan: Maximum horizontal reach from the guide rail (Default:7).maxShaftHeight: Maximum vertical travel height (Default:384blocks).elevatorSpeed: Travel speed in blocks per tick (Default:0.20= 4 blocks per second).
📌 Requirements
- Minecraft: 26.3
- Mod Loader: NeoForge (version 26.3.0.48-beta or later)
- Environment: Client and Server required.
💬 Modpacks & Permissions
You are welcome to include Elevators and More in any public or private modpack!
常见问题
Elevators and More 支持哪些 Minecraft 版本?
Elevators and More 支持 Minecraft Java 版 26.3,可用的加载器:NeoForge。下载时注意选择和你游戏版本一致的文件。
Elevators and More 怎么安装?
先用 PCL2 或 HMCL 启动器安装对应版本的 NeoForge,再把下载的 .jar 文件放进游戏目录的 mods 文件夹,重新启动游戏即可。开启了版本隔离的,mods 文件夹在 versions/版本名 下面。

评论
登录后评论和评分