
Custom Title & Icon
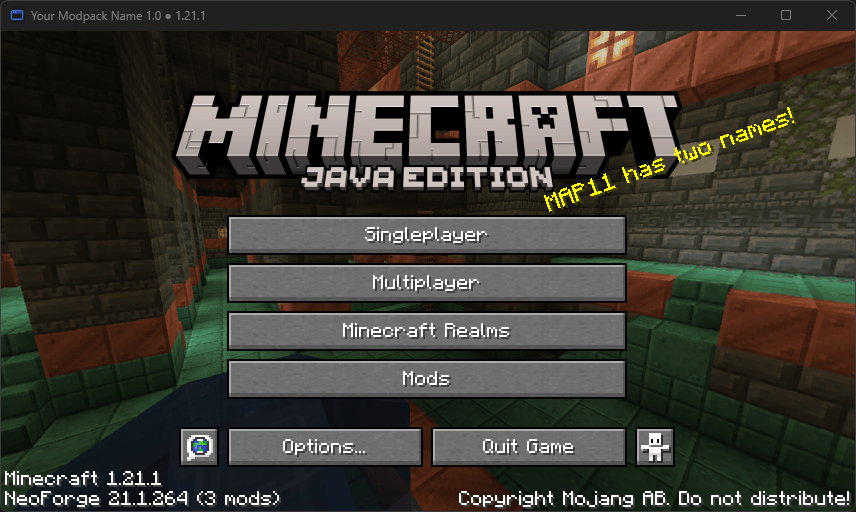
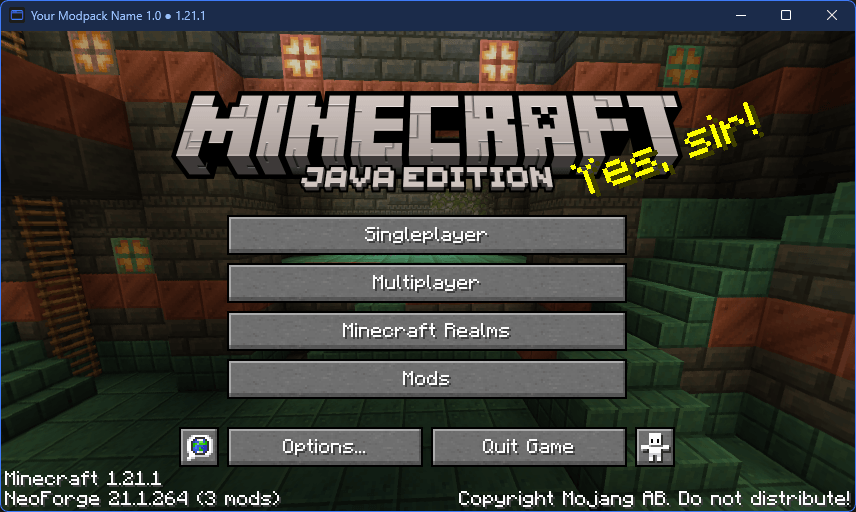
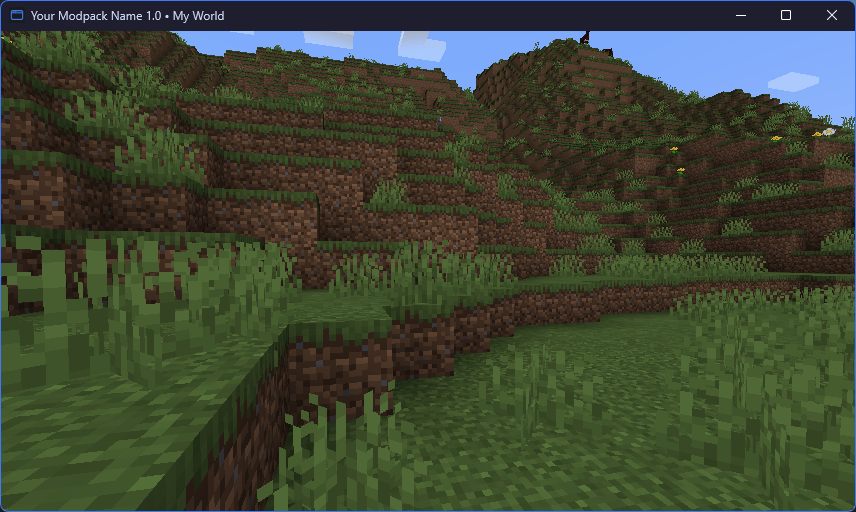
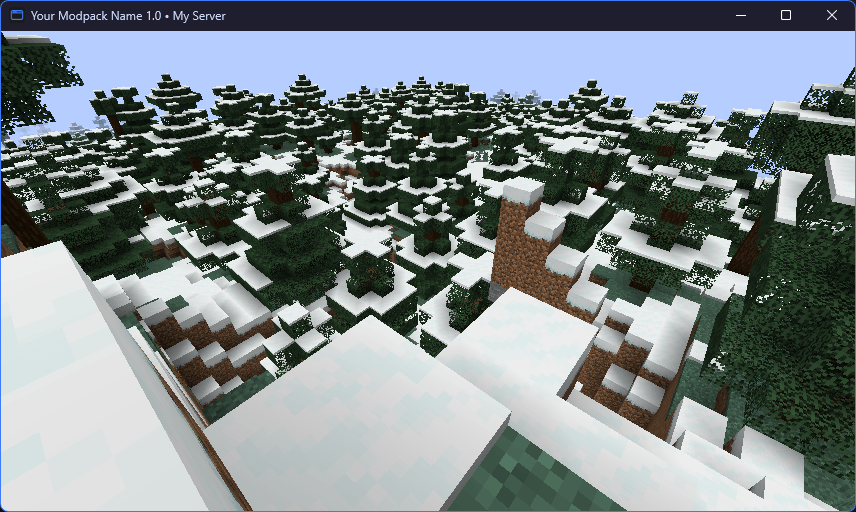
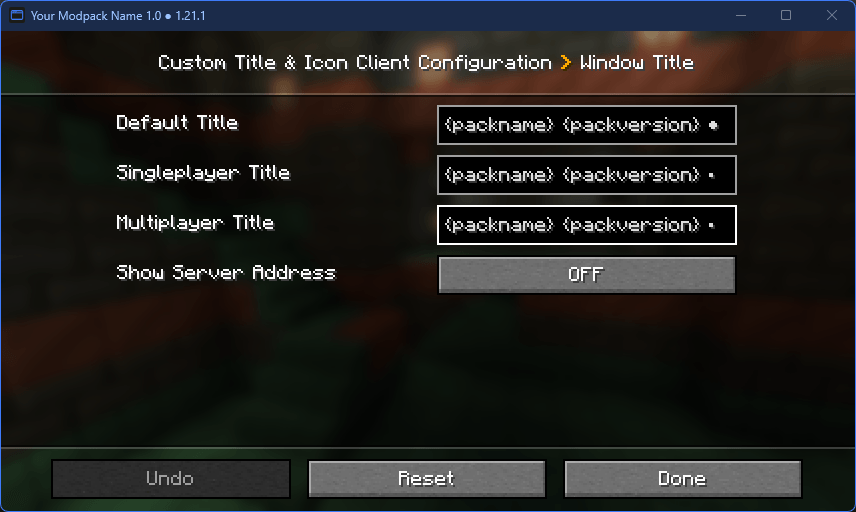
Set the window title, icon, title bar colors and window size from one config file. Separate titles for menus, singleplayer and multiplayer, with pack version, world or server name. Client-side.
截图
介绍
Custom Title & Icon lets a modpack show its own name, version and icon on the game window. Everything is set in one
config file, which can also be edited in game.
It is a client-side mod for NeoForge 1.21.1. Servers do not need it, and players with the mod can join servers without
it.
Features
Window title
- A title for the menus, one for singleplayer and one for multiplayer
- Variables:
{packname},{packversion},{mcversion},{neoforge},{modcount},{username},{world},
{server},{address}and{modversion:<modid>} - The server address is only shown when you turn it on, so it does not end up on stream by accident
Window icon
- One square PNG is enough. The mod scales it to 16, 24, 32, 48, 64, 128 and 256 pixels without dark edges around
transparent parts. - Small sizes can be drawn by hand (
icon-16.png,icon-24.png, …) and are used instead of the scaled ones - The icon shows up as soon as the game window is created, in the title bar and on the taskbar
Title bar on Windows
- Light or dark title bar, or follow the Windows app mode (Windows 10 1809 and newer)
- Custom title bar, title text and border colors (Windows 11)
Window
- Taskbar flash when the game finishes loading, or when a server disconnects you while you are in another window
- Initial window size and starting maximized
- Remember the window size, position and maximized state between starts. A window from a monitor that is no longer
connected is moved back to the main monitor.
Example config
config/customtitleicon-client.toml:
[pack]
    name = "Example Pack"
    version = "2.1.0"

[title]
    default = "{packname} {packversion}"
    singleplayer = "{packname} {packversion} - {world}"
    multiplayer = "{packname} {packversion} - {server}"
    show_server_address = false

[icon]
    file = "customtitleicon/icon.png"

[titlebar]
    theme = "system"
    caption_color = "#1E1E2E"
    text_color = "#CDD6F4"
    border_color = ""

[window]
    flash_when_loaded = true
    flash_on_disconnect = false
    initial_width = 1600
    initial_height = 900
    start_maximized = false
    remember_size = true
Title, icon and title bar changes apply as soon as the file is saved. Window size settings apply at the next start.
Preparing the icon
- Make a square PNG with a transparent background, 256×256 or 512×512.
- Save it as
config/customtitleicon/icon.png. The folder is created on first start. - Optionally, add hand-drawn
icon-16.png,icon-24.pngandicon-32.pngnext to it for a sharp title bar icon at
100%, 150% and 200% display scaling.
Supported systems
| Feature | Windows 11 | Windows 10 1809+ | Linux (X11) | Linux (Wayland) | macOS |
|---|---|---|---|---|---|
| Window title | Yes | Yes | Yes | Yes | Yes |
| Window icon | Yes | Yes | Yes | Ignored | Ignored |
| Title bar theme | Yes | Yes | Ignored | Ignored | Ignored |
| Title bar colors | Yes | Ignored | Ignored | Ignored | Ignored |
A setting that a system does not support is skipped. A wrong value or a broken icon file only logs a warning, the
game keeps running with the vanilla behavior.
Links
- Source code and full documentation: https://github.com/wortiiik/custom-title-icon
- Bug reports: https://github.com/wortiiik/custom-title-icon/issues
MIT license.
常见问题
Custom Title & Icon 支持哪些 Minecraft 版本?
Custom Title & Icon 支持 Minecraft Java 版 1.21.1,可用的加载器:NeoForge。下载时注意选择和你游戏版本一致的文件。
Custom Title & Icon 怎么安装?
先用 PCL2 或 HMCL 启动器安装对应版本的 NeoForge,再把下载的 .jar 文件放进游戏目录的 mods 文件夹,重新启动游戏即可。开启了版本隔离的,mods 文件夹在 versions/版本名 下面。
Wortiik 的其他作品
查看全部 →
MEKAFORGE
Enhanced Minecraft experience with a touch of automation, enriched with new elements and adventures

TECHTRONIA
Enhanced Minecraft experience with a touch of automation, enriched with new elements and adventures
TECHCLASSIC
TechClassic is the ultimate modpack combining technology, magic, and adventure! Build advanced machines, tame dragons, and explore dangerous worlds full of mysteries. Get ready for an epic journey of innovation and discovery! 🚀🐉

TECHREALM
Our fully technical modpack brings a revolution in automation and efficiency to Minecraft. With a rich array of technological options and innovative features, it allows players to achieve a level of automation that will change the way
评论
登录后评论和评分