Auto Torch skr
[1.7.10~26.3] 自动在选定区域或玩家附近放置火把,并提供客户端光照等级显示,方便识别可能刷怪的方块。(AutoTorch、自动插火把、自动火把)
截图
介绍
自动放置火把
简体中文 | 简体中文
适用于 NeoForge、Forge 和 Fabric 的 Minecraft 1.7.10~26.3 自动放置火把与亮度覆盖显示模组。
创作动机
挖掘区域很费时间,手动放置火把也容易遗漏位置。现有的亮度覆盖显示也无法处理溺尸和沼泽史莱姆的特殊生成条件,因此建造沼泽生物农场或照亮河床都不太方便。这就是这个模组诞生的原因。
概览
- 默认按
G打开选择面板,可设置在指定区域内或玩家附近自动放置火把。 - 默认按
F7切换亮度覆盖显示,其中包含对溺尸和沼泽史莱姆的特殊检查。
| 附近放置火把 | 亮度覆盖显示 | 区域放置火把 |
|---|---|---|
| 仅客户端 | 仅客户端 | 客户端和服务器 |
截图
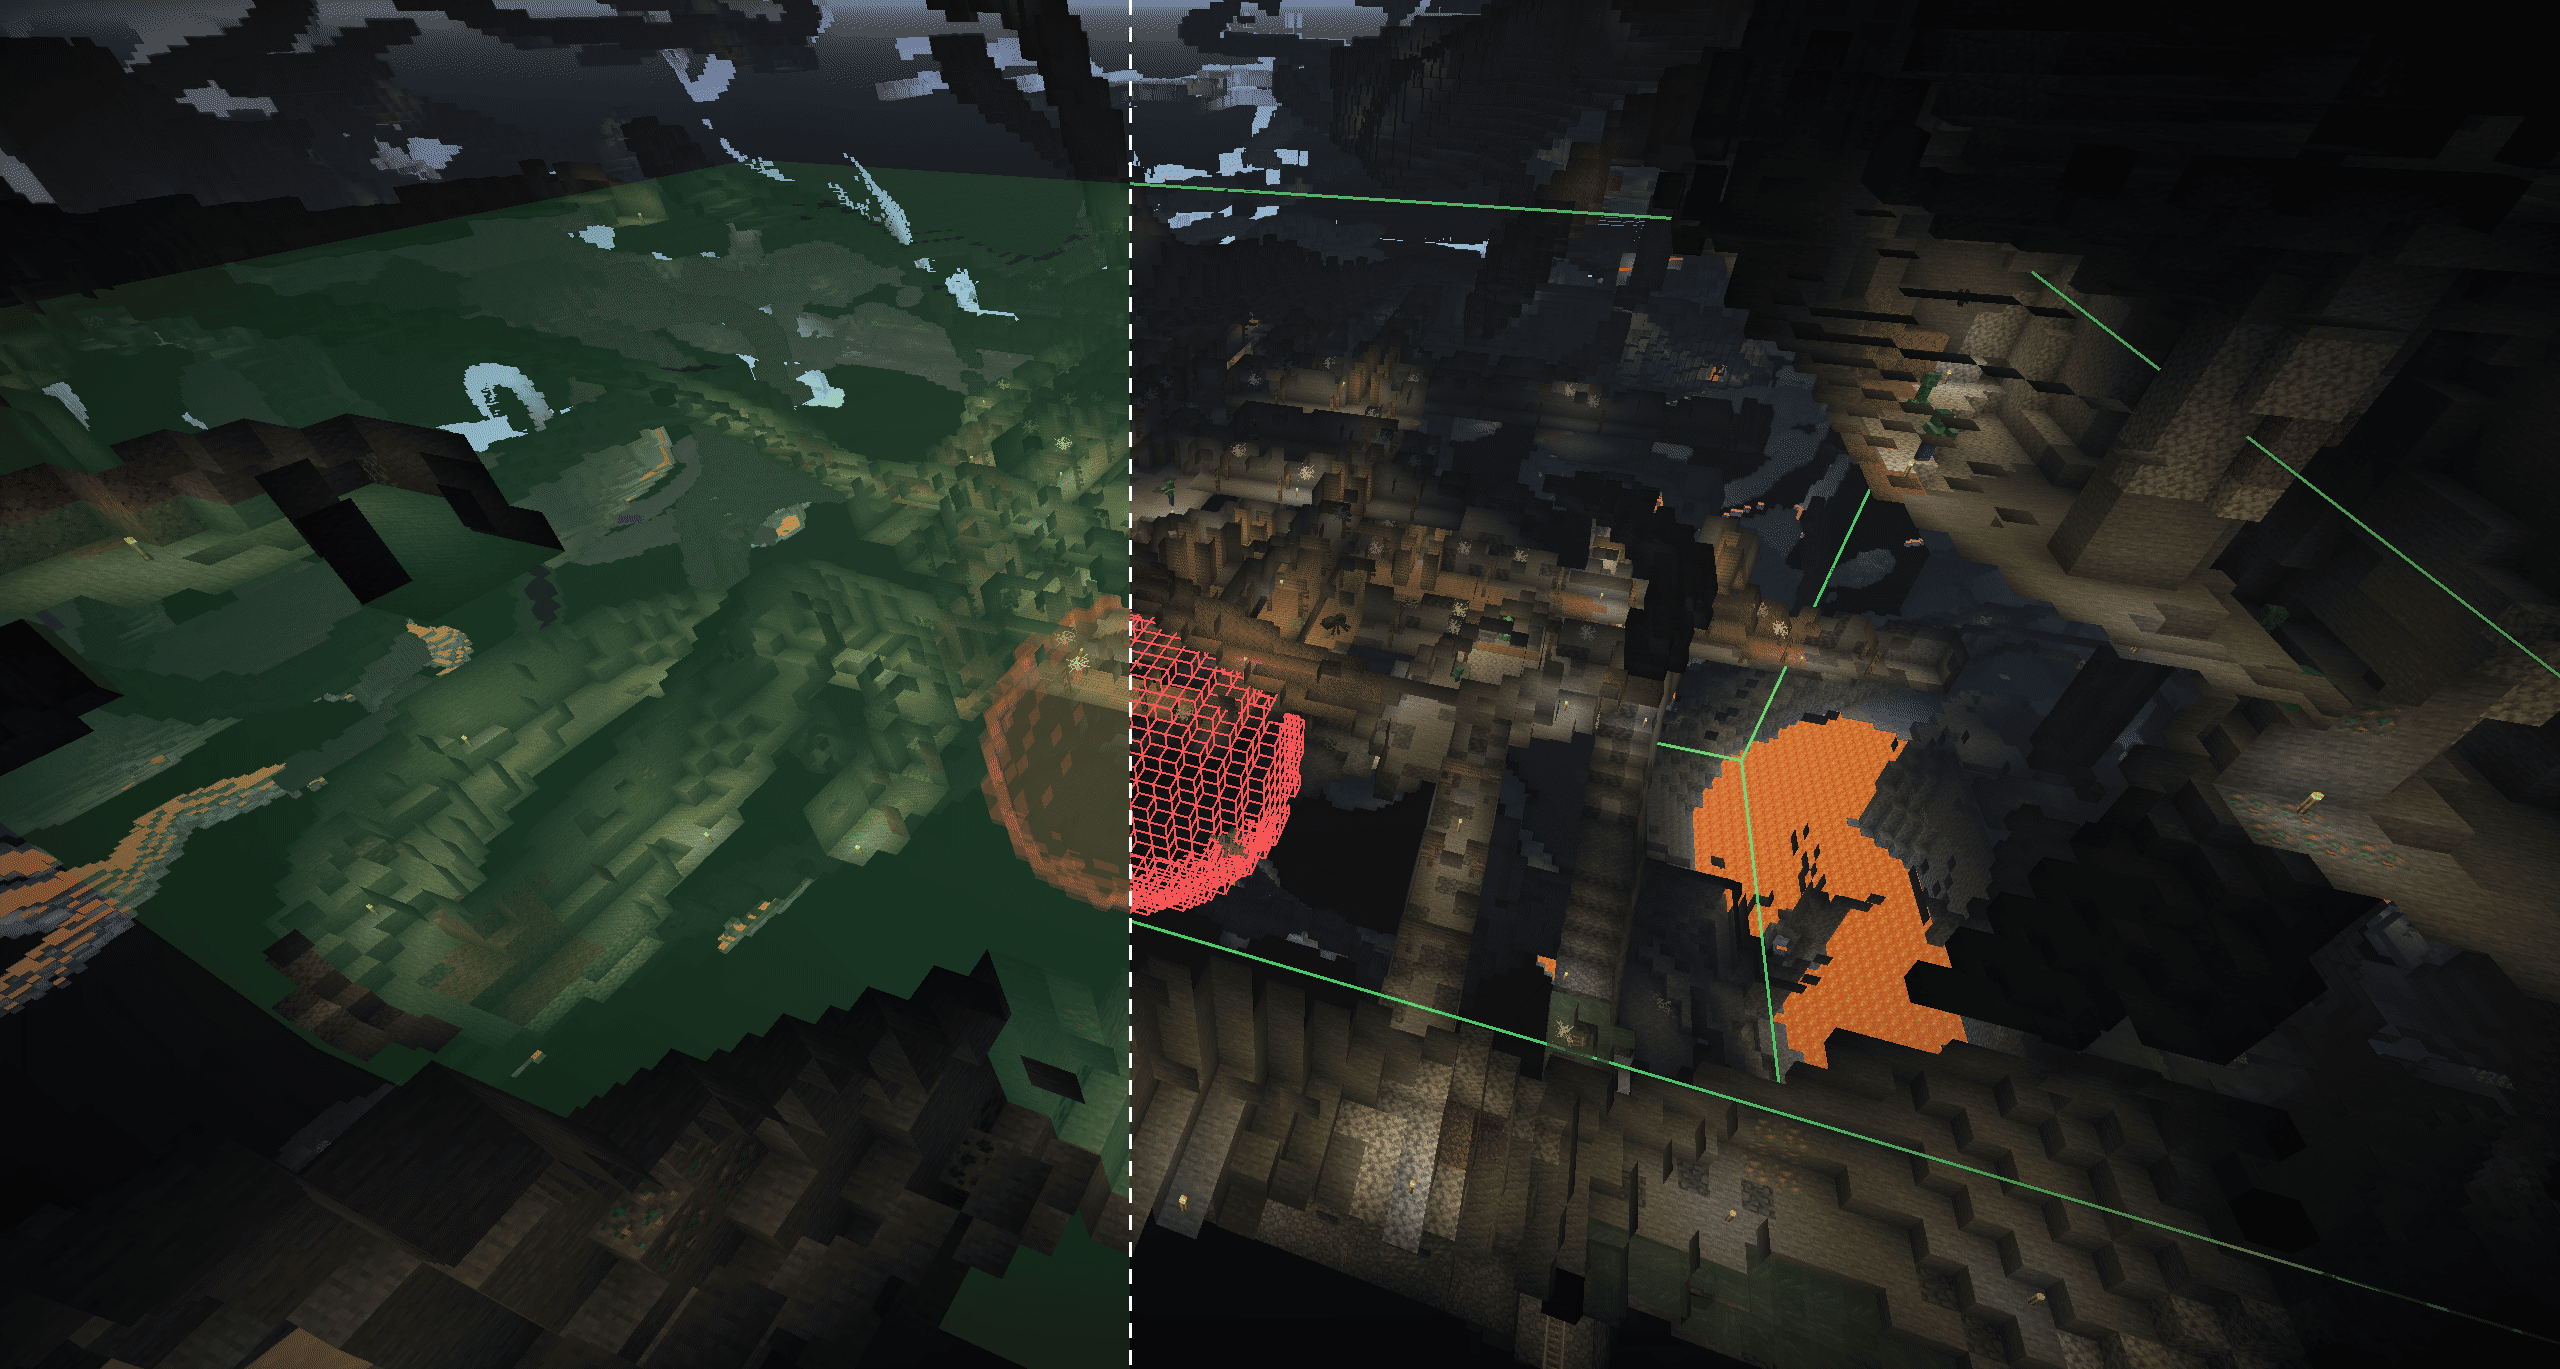
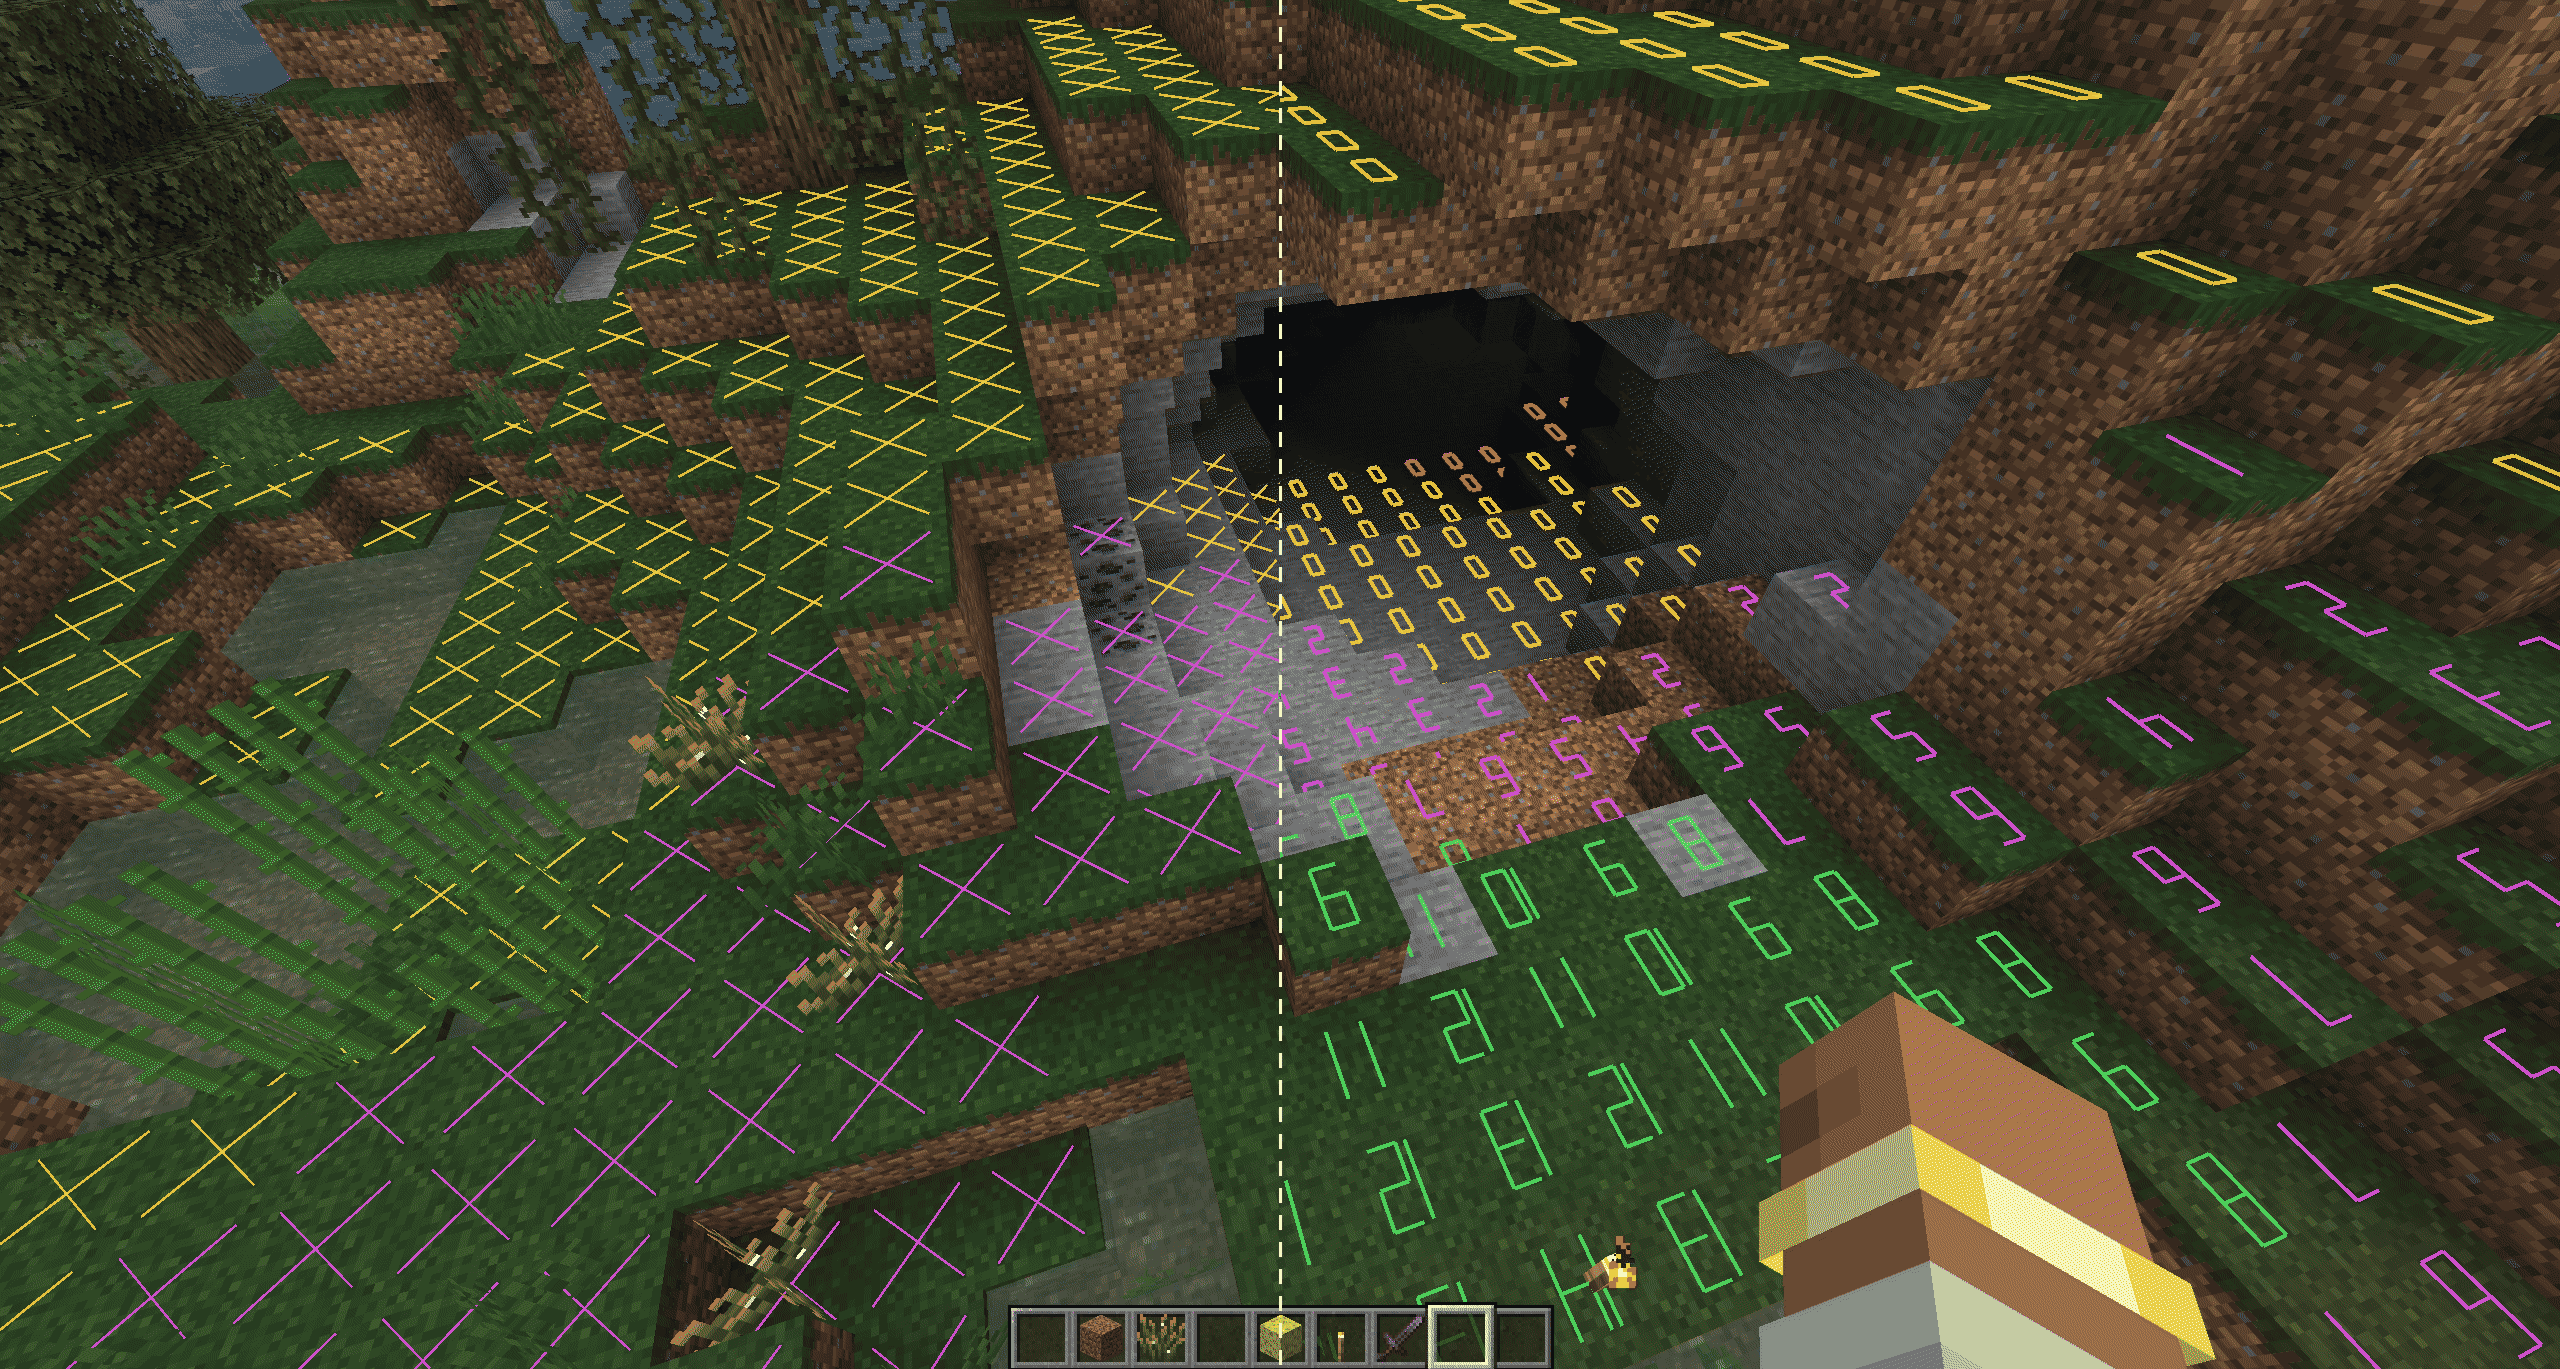

使用方法
- 默认按
G打开选择面板,按F7切换亮度覆盖显示。两个按键绑定都可以更改。 - 亮度覆盖显示:支持
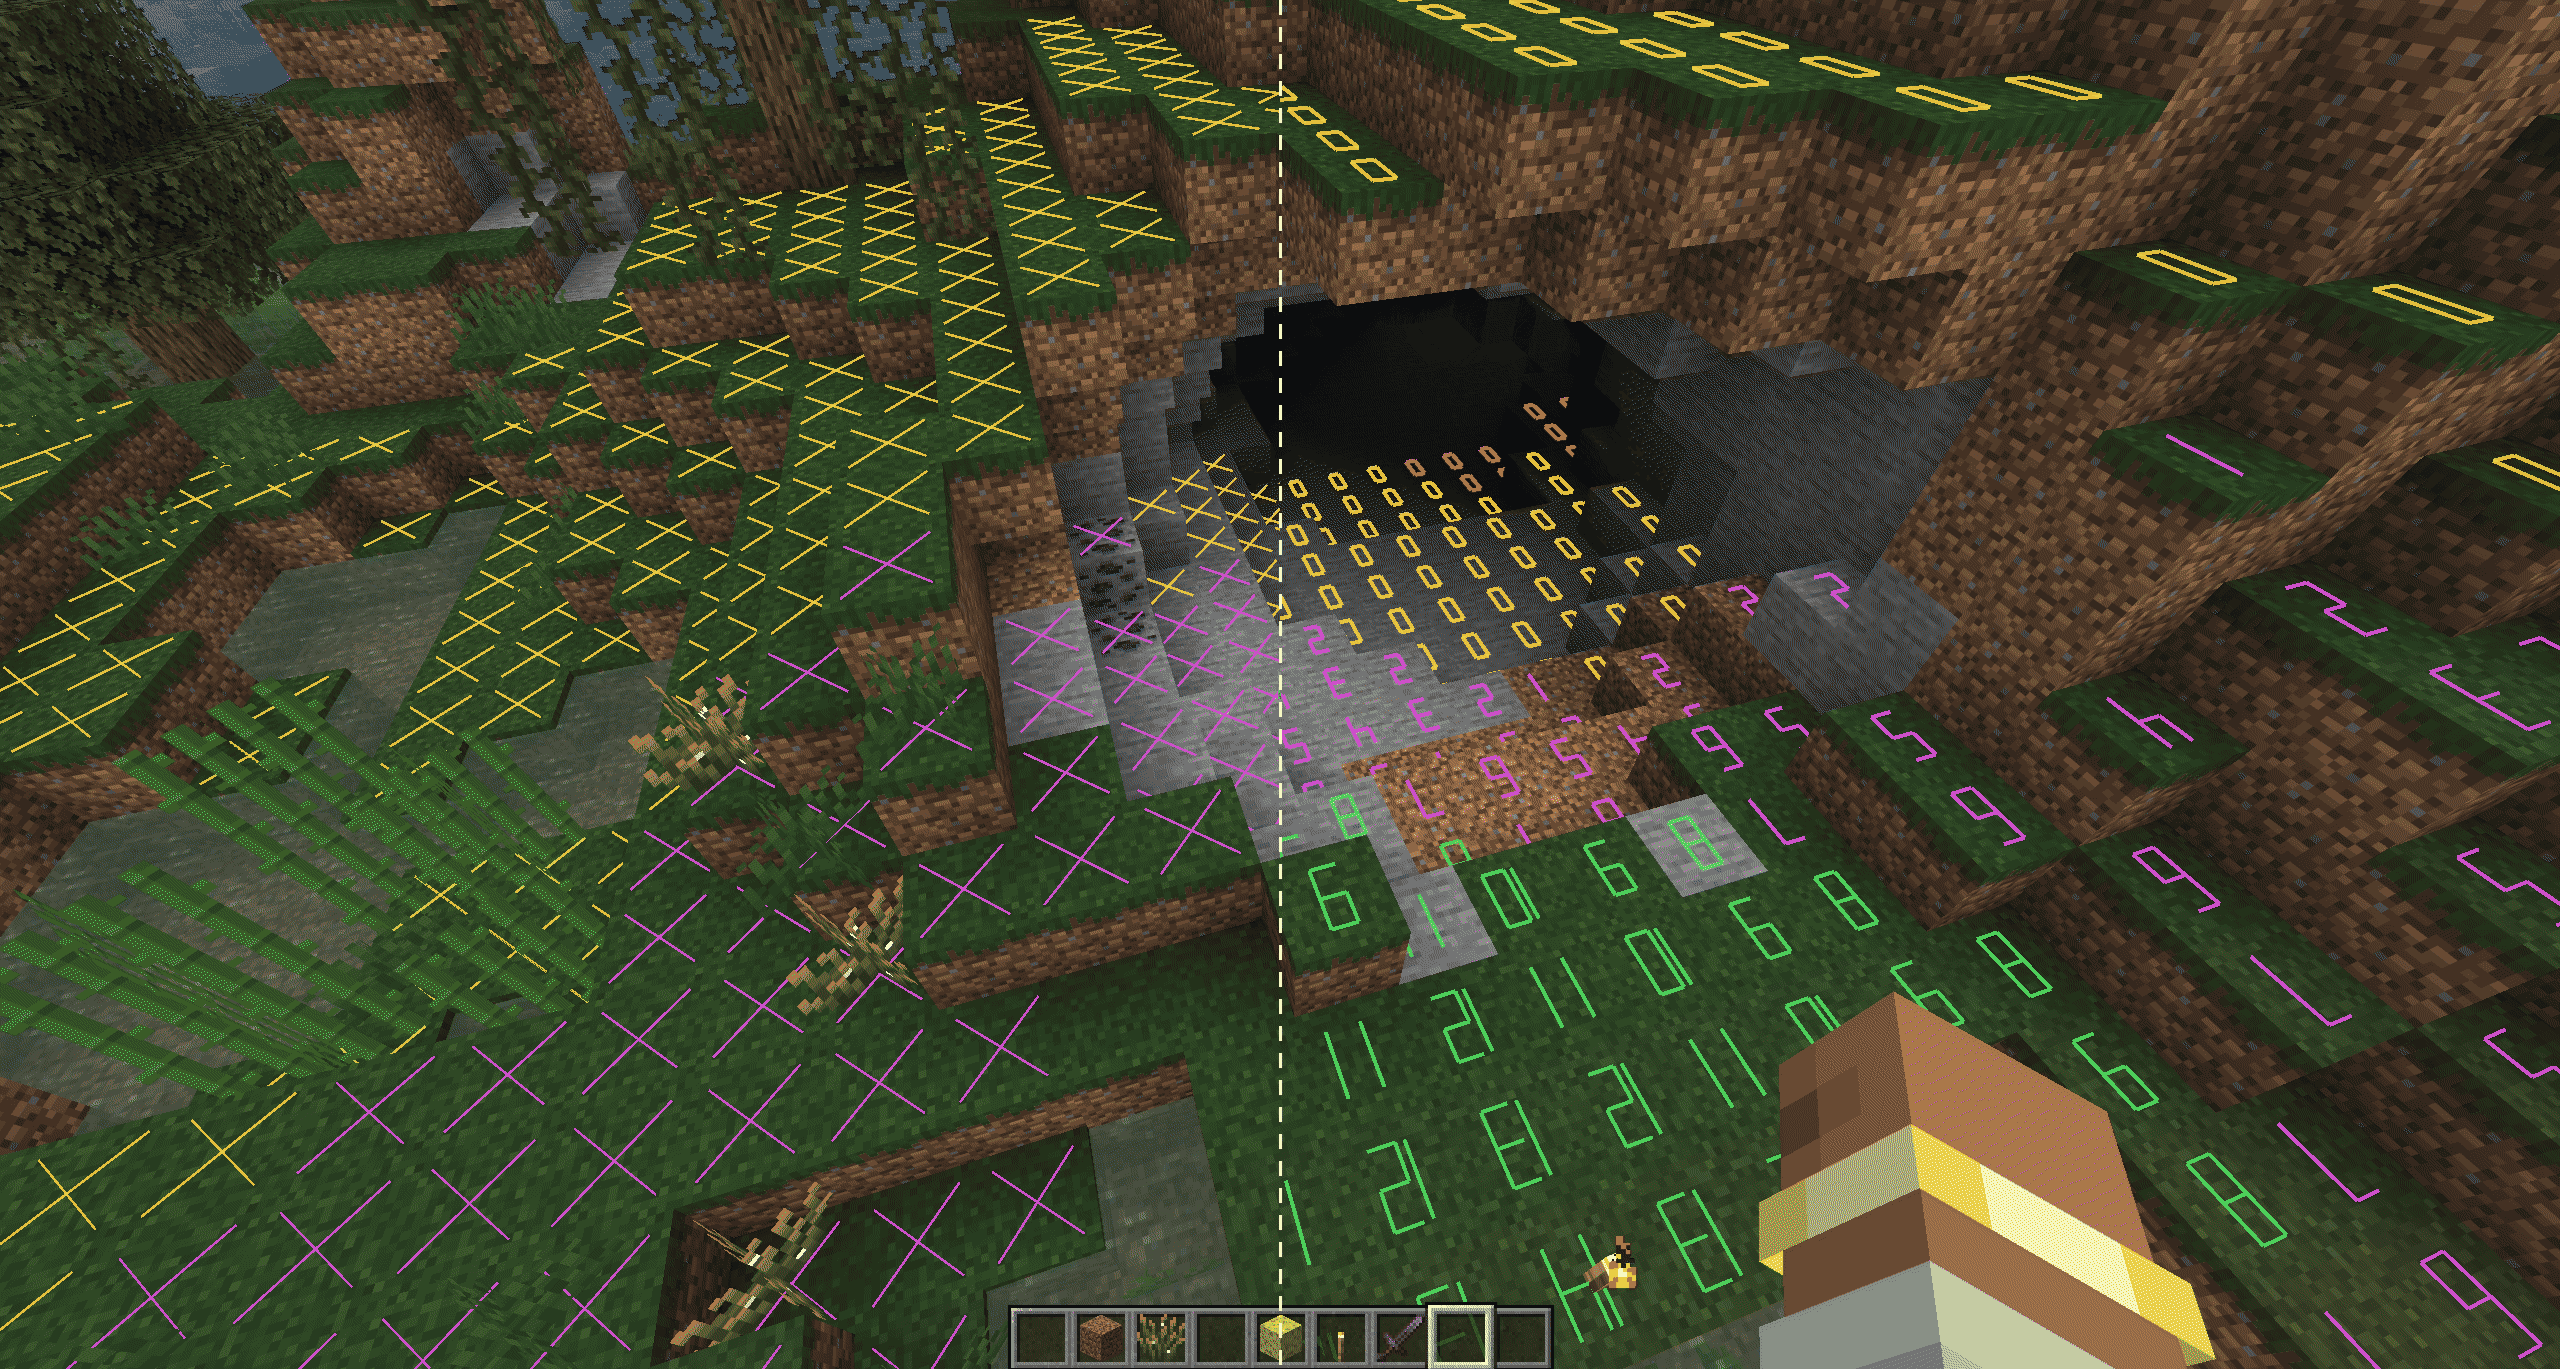
X标记、数字亮度等级和带框数字亮度等级。水平显示范围为 1–64 格,垂直方向可向上和向下各显示最多 64 格(最大范围为 64 格),并进行了性能优化。
| 颜色 | 含义 |
|---|---|
| 红色 | 生物随时都可能生成 |
| 黄色 | 生物可能在夜间生成 |
| 绿色 | 生物不会生成 |
| 紫色 | 沼泽史莱姆可能在夜间生成 |
| 青色 | 溺尸可能生成 |
- 玩家附近自动放置火把:搜索玩家周围两格内的有效位置,并通过右键交互从物品栏中放置火把。只有亮度低于设定阈值时才会放置火把;你可以选择计算时是否计入天空光照。
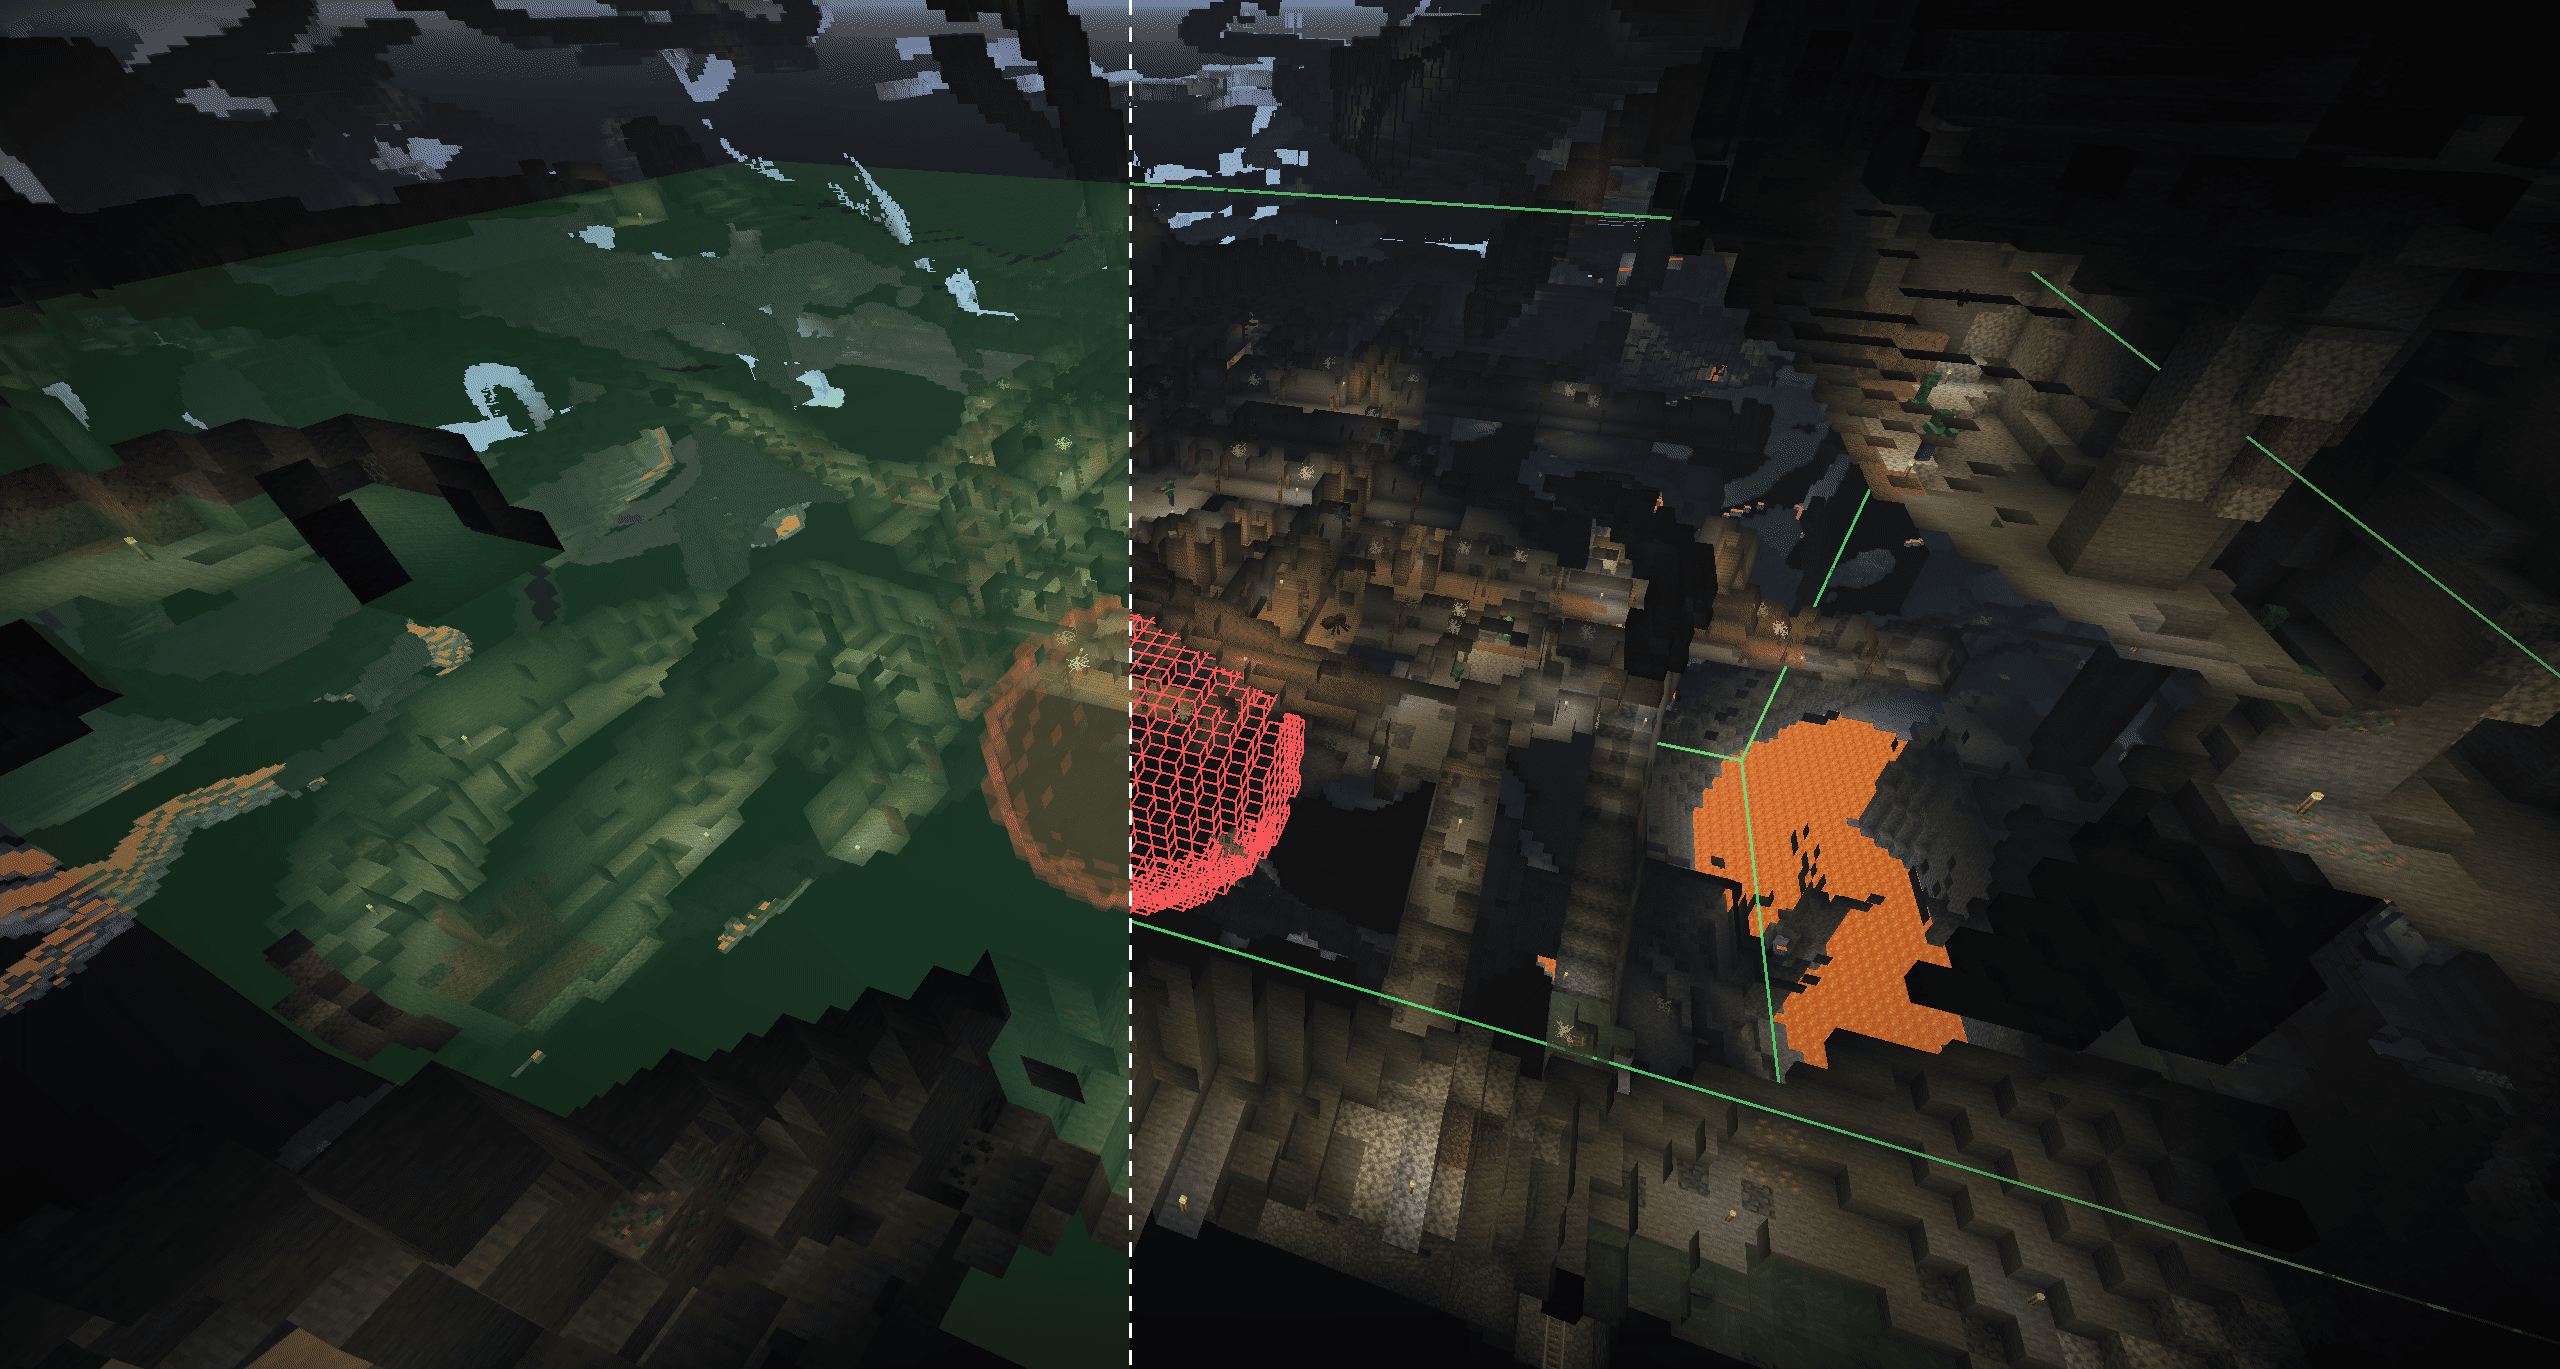
- 区域自动放置火把:选择 A 点和 B 点来定义长方体(相对的两个角)或球体(中心点和半径),并支持选择工具。将选区设为照明区域(绿色)或排除区域(红色),调整方块光照阈值,然后点击
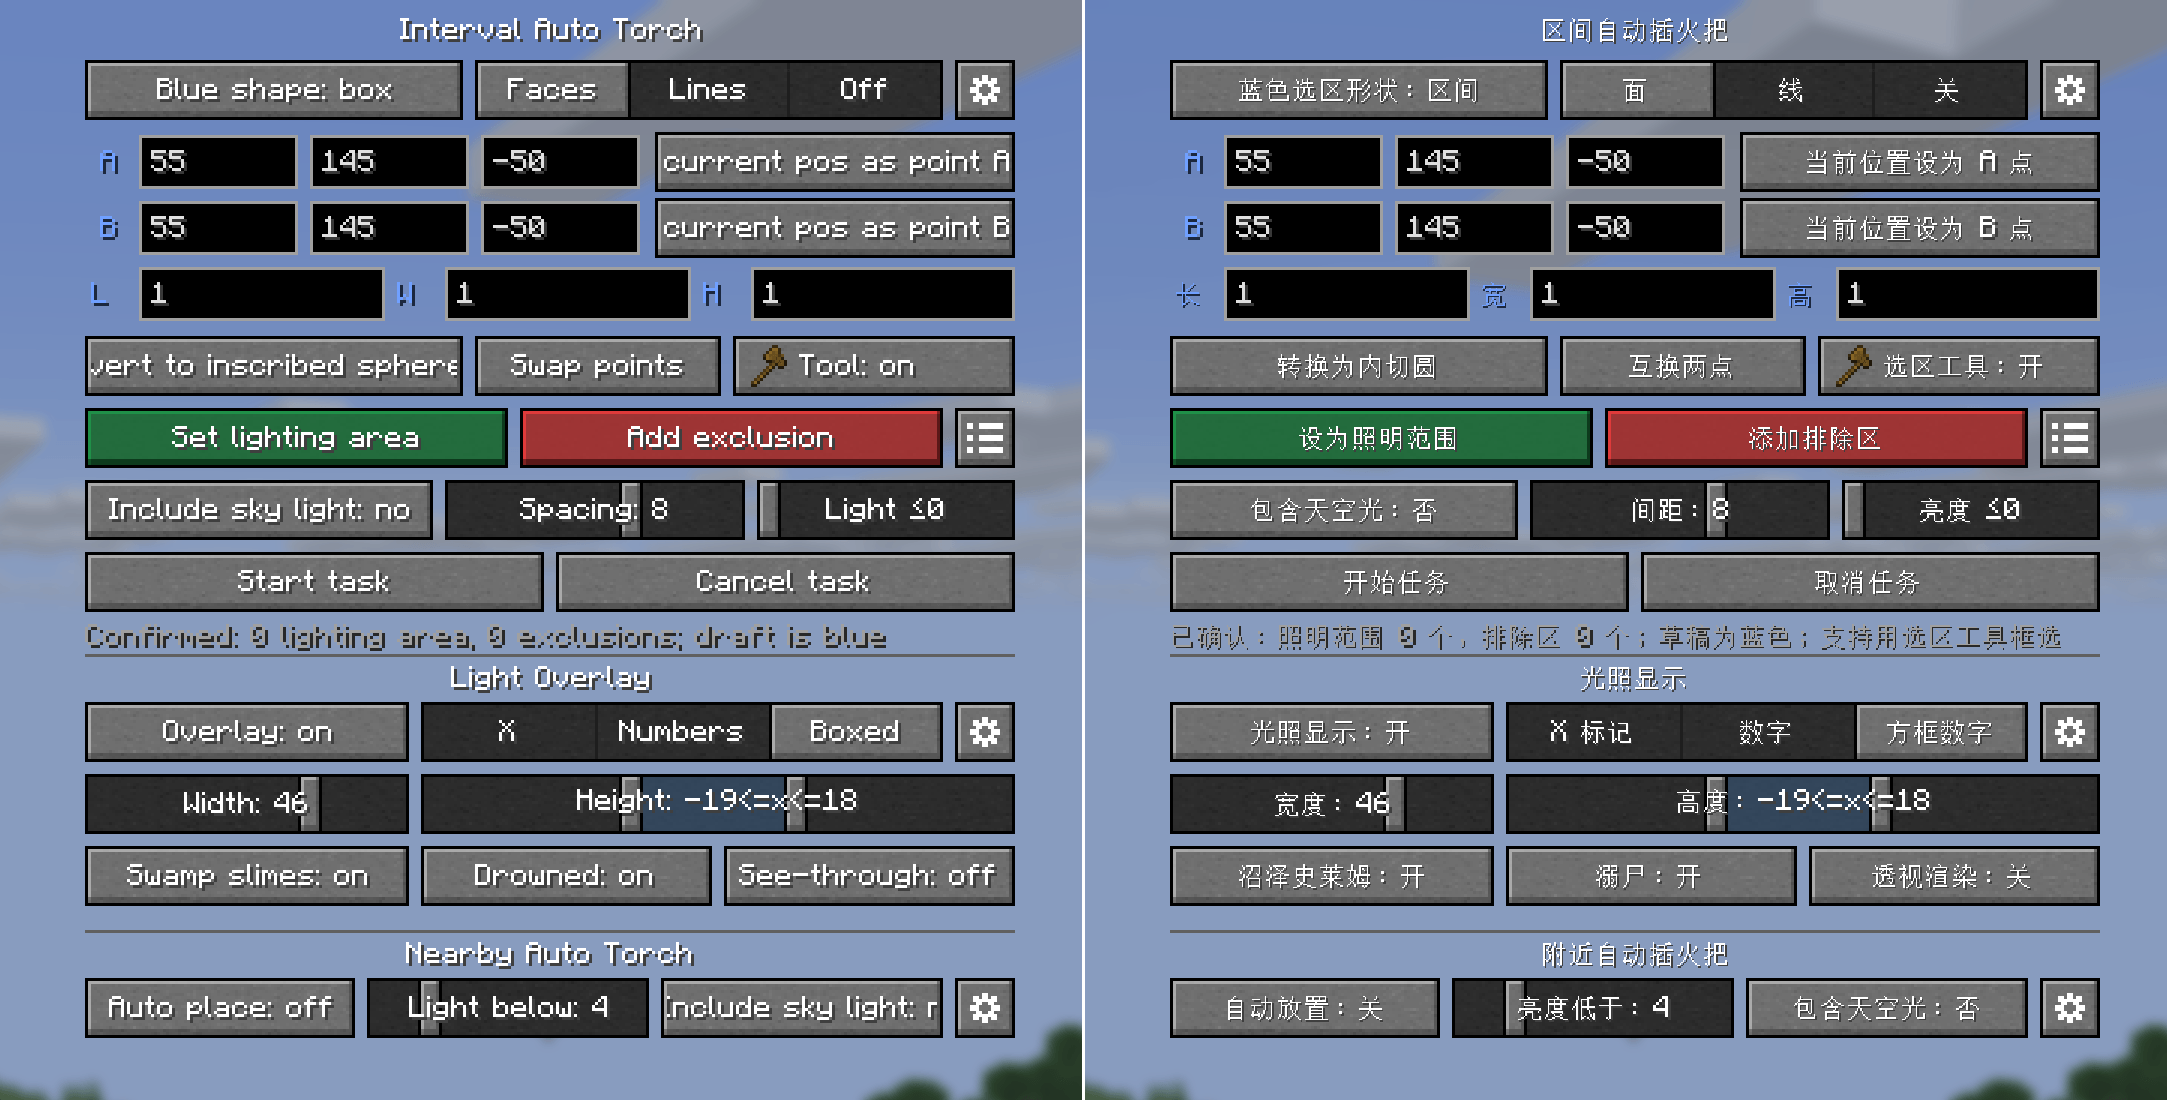
Start Task。支持一个照明区域和多个排除区域。 - 所有功能均可在上方所示的设置面板中使用。
详细说明
玩家附近自动放置火把
- 启用后,模组每 10 tick(0.5 秒)扫描一次玩家周围区域:水平半径为 2 格,垂直范围为 -2 至 +1 格。火把会从近到远依次放置;放置失败的位置会在 40 tick(2 秒)后重试。
- 仅会在没有流体的空气方块中放置火把,且火把必须能够留在原位并且不会与玩家碰撞。
- 快捷栏或副手中必须有火把。
- 你可以设置触发放置的亮度阈值(1–16),并选择计算时是否计入天空光照。
亮度覆盖显示
- 默认按
F7切换,也可以在G面板中设置。 - 显示以当前视角为中心,水平范围可设为 1–64 格。垂直方向可选择向上和向下各最多 64 格(最大范围为 64 格)。支持自由视角等类似模组。
- 支持
X标记、数字亮度等级和带框数字亮度等级。 - 支持透视渲染,数字也可以随视角旋转。
- 标记会检查生物是否能在当前位置生成,包括沼泽史莱姆和溺尸的特殊生成条件,并用不同颜色标识检查结果。
区域自动放置火把
- 输入坐标,或使用选择工具分别左键和右键单击两个点。
- 长方体以 A 和 B 为对角顶点。球体以 A 为球心,A 到 B 的直线距离为半径。
- 你可以设置一个绿色照明区域和多个红色排除区域。提供多种显示模式。
- 设置任务的最大方块亮度(0-15)。任务会处理方块亮度小于或等于该值的位置;这些位置上方两格为空气,脚下有可站立的方块,且放置位置的方块亮度为 0。可以跳过有天空光照的位置。
- 模组会优先在黑暗位置下方放置火把。如果无法放置,则会在附近随机搜索有效位置。任务只会处理已加载区块;绝不会强制加载区块。
- 扫描分两轮进行:第一轮使用设定的最小间距,第二轮使用更小的间距来填补剩余空隙。
- 你可以限制任务放置的火把数量上限;
0表示不设上限。你还可以选择是否消耗物品栏中的普通火把。 - 每位玩家同时只能有一个任务。创建新任务会替换旧任务。
配置文件
首次启动后会自动生成两种类型的配置文件。配置文件中的布尔选项使用true或false,且不加引号。
客户端配置
文件:config/autotorch-client.toml
请发送需要翻译的英文内容。
[nearbyAutoTorch]
# Whether nearby automatic torch placement is enabled.
enabled = false
# Attempt to place a torch when the light level is below this value. Range: 1-16.
lightThreshold = 4
# true: use the greater of block light and sky light; false: use block light only.
includeSkyLight = true
# Scan interval: 1-40 ticks.
scanIntervalTicks = 10
# Continuous darkness confirmation: 5-40 ticks, step 5.
darkConfirmTicks = 10
# Retry delay for the same position: 10-100 ticks, step 10.
retryDelayTicks = 40
# Horizontal scan radius: 1-4 blocks; vertical range is fixed at -2 to +1.
horizontalRadius = 2
# Block item to place; keep it in your offhand or hotbar.
item = "minecraft:torch"

[lightOverlay]
# Whether the light level overlay is enabled.
enabled = false
# Whether see-through rendering is enabled so markers can be seen through blocks.
renderThrough = false
# true: numbers rotate with the view; false: numbers remain fixed.
numberRotation = true
# Horizontal display range centered on the current camera. Range: 1-64 blocks.
horizontalRange = 16
# Number of blocks scanned downward from the current camera. Range: 0-64; the sum with upRange must not exceed 64.
downRange = 16
# Number of blocks scanned upward from the current camera. Range: 0-64; the sum with downRange must not exceed 64.
upRange = 4
# Display style: 0 = X markers, 1 = numbers, 2 = boxed numbers.
mode = 0
# Whether to mark locations that meet the vanilla spawning conditions for swamp slimes.
detectSwampSlimes = false
# Whether to mark locations that meet the vanilla spawning conditions for drowned.
detectDrowned = false
# Scan budget per tick: 2000-48000, step 2000.
scanBudgetPerTick = 12000
# Periodic refresh interval: 20-400 ticks, step 20.
refreshIntervalTicks = 100
# Drowned occlusion checks per frame: 16-256, step 16; used on 26.2 and later.
drownedBudgetPerFrame = 64
# Near line width: 0.25-8.0; minimum far line width: 0.75-2.5.
nearLineWidth = 2.5
farLineWidth = 0.75
# Marker colors: six-digit hexadecimal RGB, without #.
alwaysRiskColor = "FF3030"
nightRiskColor = "FFD23C"
safeColor = "50E060"
swampSlimeColor = "E050E0"
drownedColor = "40D8E8"
# Marker opacity: 0-255.
markerAlpha = 224

[selectionOverlay]
# Whether to display the lighting area and exclusion areas.
enabled = true
# true: show outlines only; false: show translucent faces.
linesOnly = false
# Whether to use smoother rendering for spherical selections.
smoothSpheres = false
# Near line width: 0.25-8.0; minimum far line width: 0.75-3.0.
nearLineWidth = 3.0
farLineWidth = 0.75
# Draft, lighting area and exclusion colors: six-digit hexadecimal RGB.
draftColor = "70A0FF"
mainColor = "50FF70"
exclusionColor = "FF5050"
# Selection face and exclusion face opacity: 0-255.
faceAlpha = 40
exclusionFaceAlpha = 48
# Sphere longitude and latitude segments: 12-48, step 4.
sphereLongitudeSegments = 24
sphereLatitudeSegments = 12
# Selection tool: any valid non-air item ID.
toolItem = "minecraft:wooden_axe"
# Whether left- and right-clicking with the selection tool selects points A and B; when disabled, the item regains its normal interaction.
selectionToolEnabled = true
# Whether the convert and swap buttons in the interval screen use symbols; false shows text.
symbolButtons = false

[lightingTaskDefaults]
# Default maximum number of torches per task. Range: 0-4096, step 128; 0 means unlimited.
maxTorches = 0
# Default minimum spacing between torches. Range: 1-12 blocks.
minSpacing = 8
# Process positions whose block light is at or below this value. Range: 0-15; 0 means block light 0 only.
lightThreshold = 0
# Whether positions with sky light are included by default; false means only positions without sky light.
includeSkyLight = false
# Whether Creative mode consumes torches from the inventory by default.
creativeConsumeTorches = false
# Whether Survival mode consumes torches from the inventory by default in single-player.
# In multiplayer, the server's gameplay.survivalConsumesTorches setting takes precedence.
survivalConsumeTorches = true
# Progress update interval: 10-40 ticks, step 10.
progressIntervalTicks = 10
# Block item placed by area tasks.
placementItem = "minecraft:torch"
服务器配置
文件:<world directory>/serverconfig/autotorch-server.toml 单人游戏位置:config/autotorch-server.toml
NeoForge 中,26.3 将配置文件重命名为
autotorch-synced.toml。
[lightingTask]
# Allow area placement tasks; disabling this stops existing tasks and rejects new ones.
enabled = true

[limits]
# Maximum allowed length of any side of a cuboid. Range: 1-321 blocks.
maxBoxAxisLength = 321
# Maximum allowed radius of a spherical selection. Range: 1-160 blocks.
maxSphereRadius = 160
# Maximum number of exclusion areas allowed in a single task. Range: 0-32.
maxExclusions = 32
# Maximum number of torches that can be set for a single task. Range: 1-4096.
maxTorchesPerTask = 4096
# Whether clients may set the maximum torch count to 0 (unlimited).
allowUnlimitedTorches = true
# Lower and upper bounds for torch spacing configurable by clients. Both range from 1-12.
minSpacing = 1
maxSpacing = 12
# Maximum number of tasks that can run concurrently across the server. Range: 1-1024.
maxConcurrentTasks = 64

[gameplay]
# Whether Survival mode tasks must consume regular torches from the player's inventory.
survivalConsumesTorches = true

[performance]
# Maximum number of blocks scanned by each task per tick. Range: 1-120000.
scanBudgetPerTaskTick = 12000
# Maximum number of torches placed by each task per tick. Range: 1-64.
placeBudgetPerTaskTick = 8
# Maximum total number of blocks scanned by all tasks per server tick. Range: 1-240000.
globalScanBudgetPerTick = 24000
# Maximum total number of torches placed by all tasks per server tick. Range: 1-256.
globalPlaceBudgetPerTick = 16
# Maximum number of attempts to find a valid torch position near each dark position. Range: 1-128.
randomPlacementAttempts = 32
其他
- “可以生成”采用适用于常见原版敌对生物的保守检查,不会针对其他模组进行特殊处理。
- 不支持领地认领插件。放置操作使用原版
/setblock命令。 - 目前尚未发现显示天空光照有什么实际用途,因此暂时没有添加该功能的计划。
常见问题
Auto Torch skr 支持哪些 Minecraft 版本?
Auto Torch skr 支持 Minecraft Java 版 1.7.10–26.3,共 21 个版本,可用的加载器:Fabric / Forge / NeoForge。下载时注意选择和你游戏版本一致的文件。
Auto Torch skr 怎么安装?
先用 PCL2 或 HMCL 启动器安装对应版本的 Fabric / Forge / NeoForge,再把下载的 .jar 文件放进游戏目录的 mods 文件夹,重新启动游戏即可。开启了版本隔离的,mods 文件夹在 versions/版本名 下面。
sakurakugu 的其他作品
查看全部 →
Auto Torch
[1.7.10~26.3] Automatically places torches in selected areas or near the player, with a client-side light level overlay for identifying mob-spawnable blocks. 在选定区域或玩家附近自动放置火把,并提供客户端光照等级显示,快速定位可能刷怪的位置。(AutoTorch、自动插火把、自动火把)

ArchWeaver
[26.1.2] Manage fake players and keep chunks loaded, with inventory controls, automated actions, presets, and an interactive chunk map.
评论
登录后评论和评分