ItemrenderAPI
A NeoForge API for customizable item and armor tints, emissive glow, overlays, halos, and optional dynamic lighting.
截图
介绍
ItemRenderAPI
A focused NeoForge rendering API for dynamic item and worn-armor visuals.
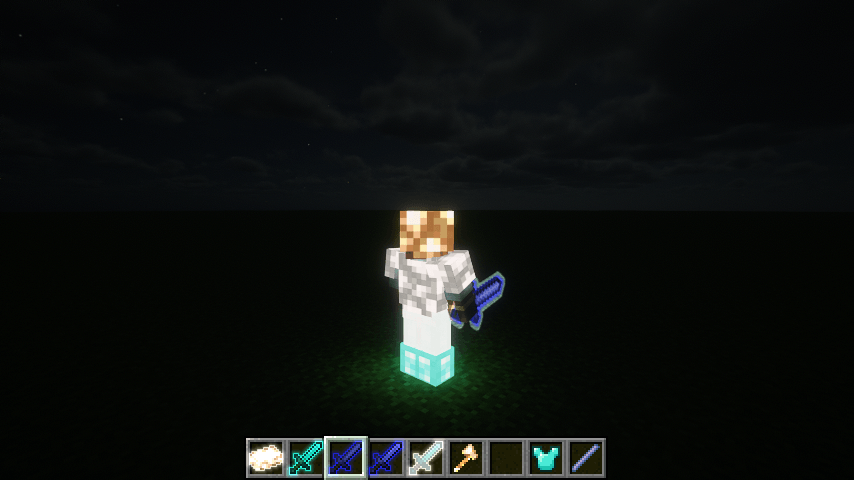
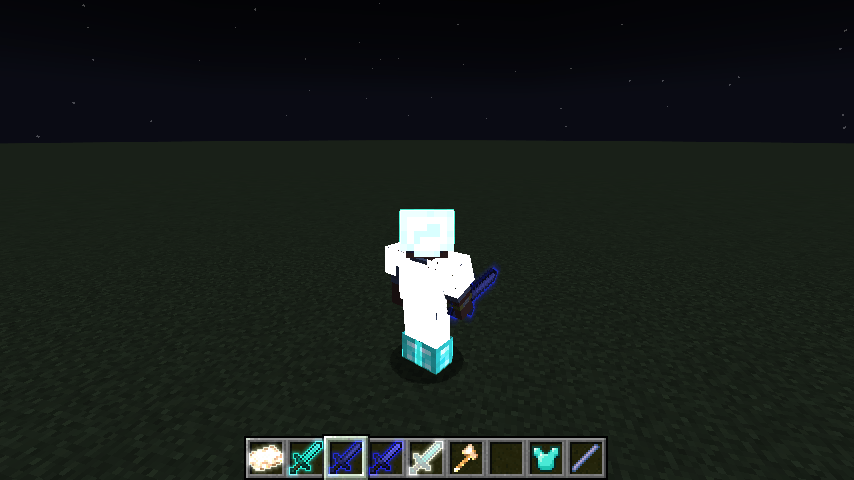
ItemRenderAPI lets mod developers attach polished visual effects to individual ItemStacks without replacing the original item model. Tint, emissive glow, contour halos, texture overlays, glint behavior, and optional world lighting are stored with the item and follow it through inventories, equipment slots, dropped entities, and item frames.
The mod is designed as an API and integration library. Its built-in commands are useful for testing and content setup, while production mods can use the public Java API and disable those commands entirely.
✨ Features
| Feature | What it provides |
|---|---|
| Texture-aware tinting | Applies adjustable RGB color while preserving texture detail and transparent silhouettes, including white and near-white tinting. |
| Independent emissive glow | Gives items and humanoid armor a full-bright surface with a color separate from the normal tint. |
| Contour halo | Adds a narrow bright core and soft outer glow. Supported item silhouettes respond continuously to emissive strength. |
| FIXED overlays | Composites multiple colored, translucent textures over an item without filling transparent pixels. |
| Worn armor effects | Supports helmets, chestplates, leggings, and boots on players, humanoid mobs, and armor stands. |
| Optional world lighting | Integrates with RyoamicLights when installed; the rendering features remain available without it. |
| Shader compatibility | Includes dedicated paths for Iris shader packs and Sodium rendering. Final Bloom appearance still depends on the active shader pack. |
| Stable developer API | Exposes a documented API under com.moyvsky.itemrenderapi.api, including command-registration controls. |
📦 Requirements
- Minecraft: 1.21.1
- Mod loader: NeoForge 21.1.176 or newer within the 21.1.x series
- Java: 21
- ItemRenderAPI: install on both the client and server for multiplayer use
Optional integrations
- Iris: shader-pack compatibility
- Sodium: supported optimized renderer
- RyoamicLights 0.2.11+: dynamic world lighting
- ObsidianUI: required by the matching RyoamicLights build, when applicable
Iris, Sodium, and RyoamicLights are not required for tint, overlays, emissive surfaces, or local halo rendering.
🚀 Installation
- Install Minecraft 1.21.1 and a compatible NeoForge 21.1.x build.
- Place
itemrenderapi-1.2.0+1.21.1.jarin the instance’smodsfolder. - Remove older ItemRenderAPI JARs so only one version is installed.
- Install the same JAR on the server and connecting clients when using it in multiplayer.
ItemRenderAPI does not add recipes or ordinary survival content by itself. Other mods use it to define and control visual effects.
🎮 Built-in commands
The /itemrender command edits the item held in the main hand and requires permission level 2.
/itemrender set color <RRGGBB>
/itemrender set tint <0..10>
/itemrender set glowing <true|false>
/itemrender set glowcolor <RRGGBB|clear>
/itemrender set light <0..100>
/itemrender set bloom <true|false>
/itemrender overlay add <namespace:path> [opacity] [replace]
/itemrender overlay clear
/itemrender status
Examples:
/itemrender set color 55AAFF
/itemrender set tint 7.5
/itemrender set glowing true
/itemrender set glowcolor FFFFFF
/itemrender set light 75
Client-side diagnostics are available through:
/itemrenderclient halowidth <0.25..4>
/itemrenderclient stats
/itemrenderclient reset
/itemrenderclient profile
/itemrenderclient cancel
halowidth is session-only and affects supported item contours. profile records 600 client frame intervals plus ItemRenderAPI CPU submission counters; it is a diagnostic tool, not a GPU benchmark.
🧩 Developer quick start
Only the following package is a stable public API:
com.moyvsky.itemrenderapi.apiApply an effect to an ItemStack:
import com.moyvsky.itemrenderapi.api.ItemVisuals;

ItemVisuals.setColor(stack, 0x55AAFF, 0.7F);
ItemVisuals.setGlowing(stack, true);
ItemVisuals.setEmissiveColor(stack, 0xFFFFFF);
ItemVisuals.setEmissiveStrength(stack, 0.75F);
ItemVisuals.setWorldLightLevel(stack, 12.0F);
The visual state remains attached to that stack. Use ItemVisuals.clear(stack) to remove the complete state, or the dedicated clear methods to remove one effect.
Disable the built-in commands
Production integrations can hide all ItemRenderAPI commands. Call this during your mod constructor, before NeoForge fires command-registration events:
import com.moyvsky.itemrenderapi.api.ItemRenderCommandControl;

ItemRenderCommandControl.disableAll();
Granular controls are also available:
// Disable the operator-facing /itemrender command only.
ItemRenderCommandControl.disableItemCommands();

// Disable the local /itemrenderclient diagnostics only.
ItemRenderCommandControl.disableClientCommands();
Disabling is permanent for the current game process. Commands that have already been registered cannot be removed afterward, and another mod cannot re-enable a category disabled by an integration.
Add a FIXED overlay
import com.moyvsky.itemrenderapi.api.ItemVisuals;
import com.moyvsky.itemrenderapi.api.OverlaySpec;
import net.minecraft.resources.ResourceLocation;

ItemVisuals.addOverlay(stack, new OverlaySpec(
    ResourceLocation.parse("examplemod:block/runes"),
    0x66CCFF,
    0.8F,
    OverlaySpec.Mode.FIXED
));
Overlay PNG files must be available in the block atlas:
assets/examplemod/textures/block/runes.pngUse the sprite ID examplemod:block/runes in code. Do not include textures/ or .png in the ID. Source alpha, overlay alpha, and configured opacity are combined so transparent item pixels stay transparent.
Use your own non-vanilla PNG
Create or bundle a Minecraft resource pack with this structure:
assets/customoverlays/textures/block/runes.pngFor a standalone Minecraft 1.21.1 resource pack, use resource-pack format 34. Enable the pack, hold the target item, then run:
/itemrender overlay add customoverlays:block/runes 0.8 falseUse a static RGBA PNG with transparency. The namespace and path must be lowercase; omit assets/, textures/, and .png from the command. false appends the layer, while true replaces all existing layers. Every multiplayer client must have the image through the integrating mod, a local resource pack, or a server resource pack.
See docs/CUSTOM-OVERLAYS.md in the project distribution for a complete pack.mcmeta, folder tree, multiple-layer examples, Java usage, reload instructions, and armor behavior.
🛡️ Worn armor support
The same VisualState automatically applies when a supported stack is worn as humanoid armor.
- Players, humanoid mobs, and armor stands are supported.
- Helmet, chestplate, leggings, and boots slots are supported.
- Vanilla armor trims and enchantment glint remain in their normal render order.
- Static FIXED overlays follow the existing armor UV layout.
- With an active shader pack, the shader pack controls the final emissive/Bloom presentation.
Animal armor and custom non-humanoid armor renderers are outside the current integration scope.
🔌 Compatibility notes
- Standard inventory, first-person, third-person, dropped-item, and item-frame paths are supported.
- Animated, high-resolution, custom-rendered, or unusual-UV models may use a fallback halo path.
- Shader packs can alter Bloom strength, color grading, tone mapping, and the final perceived glow color.
- Dynamic world light requires a compatible backend. Without one, the requested light value is stored but does not illuminate nearby blocks.
OverlaySpec.Mode.DAMAGE_10and custom multicolor glint are reserved modes and are not implemented in this release.
📚 API documentation
The distribution source contains:
docs/API.md— complete public API guidedocs/examples/ItemRenderApiConsumerExample.java— compile-checked integration exampledocs/RELEASE-1.2.0.md— release scope and known boundaries
📄 License
All Rights Reserved.
You may depend on ItemRenderAPI from another mod through its documented public API. Redistribution, modification, or repackaging is subject to the project’s license and the author’s permission.
常见问题
ItemrenderAPI 支持哪些 Minecraft 版本?
ItemrenderAPI 支持 Minecraft Java 版 1.21.1,可用的加载器:NeoForge。下载时注意选择和你游戏版本一致的文件。
ItemrenderAPI 怎么安装?
先用 PCL2 或 HMCL 启动器安装对应版本的 NeoForge,再把下载的 .jar 文件放进游戏目录的 mods 文件夹,重新启动游戏即可。开启了版本隔离的,mods 文件夹在 versions/版本名 下面。
评论
登录后评论和评分