
截图
介绍
ScreenshotUploader
NOTE: This mod will no longer be developed.
Instead take a look at Image Utils
Summary:
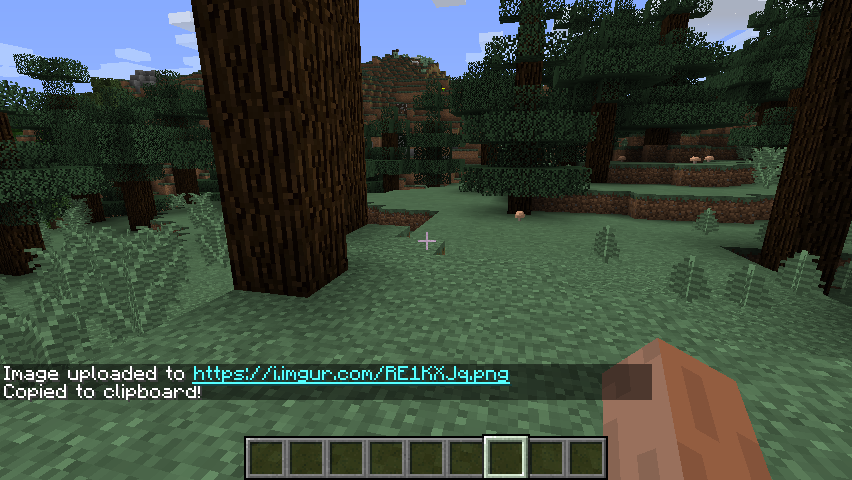
Minecraft forge mod that does exactly as it name indicates. Upload screenshots.
You can either upload to imgur or to your own custom server.
This mod has very little impact in gameplay itself. There are no new items, no new blocks.
It will however make sharing screenshots of your awesome creations a lot easier. One press of a key
and boom. Just paste the link in your discord or skype or whatever you use.
Default keys:
- F4 Upload image
- F2 Save and upload image (override has to be enabled to upload)
Features:
- Direct upload to imgur
- Copy link to clipboard (configurable)
- Upload to your own server
Planned features:
Add custom server support to upload to your own server- Filters
- Overlays/watermarks
Changing settings
- you can change your settings by going to mods on the main menu or by going to mod options in the in-game menu.
Uploading to a custom server
Once you’ve gotten to mod settings there will be a “Server settings” button
Client configuration
Link: link to the upload script Post values: add POST data to your request for servers that require some form of authentication. everything before = is considered as the key and everything after as value you can get the key like this in PHP for example: $_POST["key"] and that would return the value NOTE: {image} is required as this will send the image data. However you can choose whatever key you want. NOTE: dont use spaces between ´=´ they will be added.
Example:
image={image} //send post data with image as key and {image} as value
key=2DAC1D297E6E7E348E5CE1884A7FC //send post data with key as key and 2DAC1D297E6E7E348E5CE1884A7FC as value
if you are using some image hosting service make sure to look up what data you need to send. If you use your own upload script you can pretty much do whatever you want.
Server configuration PHP
NOTE: PLEASE for the love of your own sanity, USE VALIDATION or anyone could upload anything to your server.
This is a VERY basic example. With very little security to keep it fairly simple and straight forward. you can read https://security.stackexchange.com/questions/32852/risks-of-a-php-image-upload-form to find out more about security
Make sure to change the $key dont use the one given here.
<?php
/**
 * Created by PhpStorm.
 * User: DarkEyeDragon
 * Date: 4-4-2018
 * Time: 03:21
 */

$key = "2DAC1D297E6E7E348E5CE1884A7FC"; //this can be anything, just make sure its the same as the one you set in the client

if(isset($_FILES["image"])){ //check if there is a key named image
    if($_POST["key"] === $key) {
        $target_dir = "images/"; //directory to upload to (MUST EXIST!)
        $file_name = str_replace(".", "-", uniqid("img", false)); //get an unique id
        $target_file = $target_dir . basename($file_name . ".jpg"); //add the extention

        $fp = fopen('log.txt', 'a'); //create a file
        fwrite($fp, $_FILES["image"]); //write image data to the file to see if it comes in correctly

        if (move_uploaded_file($_FILES["screenshot"]["tmp_name"], $target_file)) {
            fwrite($fp, "The file " . basename($_FILES["screenshot"]["name"]) . " has been uploaded.");
            header("Location: http://$_SERVER[HTTP_HOST]/$target_file"); //send the url to the image back to the client
        } else {
            fwrite($fp, "Sorry, there was an error uploading your file.");
            http_response_code (500); //send an internal error back
        }
    }else{
      http_response_code (401); //send unauthorized error back
    }
}
else
    http_response_code (400); //send and invalid request error back
常见问题
Advanced Screenshot Uploader 支持哪些 Minecraft 版本?
Advanced Screenshot Uploader 支持 Minecraft Java 版 1.11–1.12.2,共 6 个版本,可用的加载器:Forge。下载时注意选择和你游戏版本一致的文件。
Advanced Screenshot Uploader 怎么安装?
先用 PCL2 或 HMCL 启动器安装对应版本的 Forge,再把下载的 .jar 文件放进游戏目录的 mods 文件夹,重新启动游戏即可。开启了版本隔离的,mods 文件夹在 versions/版本名 下面。

评论
登录后评论和评分