
截图
介绍
What does the Mod do?
This mod is designed for the automatic updating of “Client” ModPacks. These ModPacks are automatically updated whenever the “Server” ModPack is updated.
How does it work?
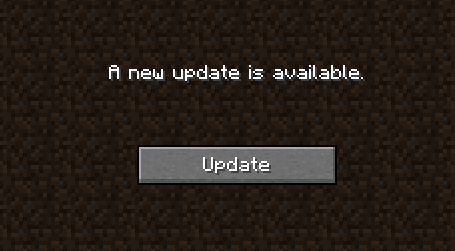
When the client is launched, if it detects an update, a window will pop up, notifying the player that the modpack has an update. There will also be a Update button, which will trigger the modpack update and then close Minecraft.
Server ModPack
This ModPack is actually a GitHub repository that contains a file with the server ModPack version and a folder with the mods.
How to set up the Server ModPack
- Create a GitHub repository. _(Public)_
- Inside the repository, create a file called
version.json. - In the version.json file, write the following:
{
    "version": "1.0.0"
}
(This version represents the server modpack version. You’ll need to increase this version whenever you add updates.)
Upload the mods in a compressed file named mods.zip (The mods should be directly in the main directory of the compressed file, meaning there should be no folders inside the compressed file.)
Client ModPack
This ModPack is for the player using these mods. It will include a pxl-updater.json file, where the current client version and the GitHub repository link will appear.
How to set up the Client Mod
- Install the mod and launch Minecraft with it for the first time.
- In your launcher, you’ll find a
configfolder, and inside it, you’ll see a file calledpxl-updater.json. - Edit this file to update the
repositoryUrlvalue. Theversionwill automatically sync to the one in the GitHub repository.
常见问题
PxL Updater 支持哪些 Minecraft 版本?
PxL Updater 支持 Minecraft Java 版 1.16.5,可用的加载器:Forge。下载时注意选择和你游戏版本一致的文件。
PxL Updater 怎么安装?
先用 PCL2 或 HMCL 启动器安装对应版本的 Forge,再把下载的 .jar 文件放进游戏目录的 mods 文件夹,重新启动游戏即可。开启了版本隔离的,mods 文件夹在 versions/版本名 下面。运行环境:仅客户端。
评论
登录后评论和评分