
OpenZiti MC
Share your server with friends without opening firewall holes using an OpenZiti overlay network. Friends need just the service name and identity -- no port forwarding, no public listeners, no public IP.
截图

介绍
OpenZiti MC
Share a Java Edition server with friends without opening firewall holes. OpenZiti MC routes the game’s network traffic
over an OpenZiti zero-trust overlay. This means the dedicated server never needs a public IP, a
public DNS name, or an open TCP port. Connect by OpenZiti service name. The OpenZiti overlay network will then
authenticate and authorize any connections to your server before a packet ever reaches it.
What it does
- Client side: when you type an OpenZiti service name into “Add Server”, the mod intercepts the Netty dial and connects over the overlay instead of TCP.
- Server side: when enabled in config, the dedicated/integrated server binds on an OpenZiti service instead of a normal TCP listener. Only authorized identities on the overlay can reach it.
Why it works the way it does
The whole mod is three Mixins hooking Netty’s Bootstrap/ServerBootstrap calls and swapping in ZitiChannelFactory
ZitiAddress.Dial/ZitiAddress.Bind. Minecraft’s packet pipeline is untouched. The OpenZiti JVM SDK is bundled
in the jar, so no extra installs.
Identities are loaded from a standard OpenZiti identity file in config/openziti/identity.json. Drop yours in, you
are done.
Requirements
- Java Edition 1.20.1
- Fabric Loader 0.16.10+
- Fabric API
- Architectury API
- A running OpenZiti controller and at least one edge router. If you don’t have an OpenZiti overlay, set one up by following a get-started guide.
OpenZiti Setup
The repo includes a setup-ziti.ps1 script that does all of this interactively and is the recommended way to set up
the OpenZiti overlay.
- create a service (
openziti-mcby default) - one identity tagged
#minecraft-serverfor the dedicated server, plus one or more identities tagged#minecraft-clientsfor each player - create the matching Bind/Dial service policies
Server Setup
Ensure the server identity is enrolled and drop the enrolled server .json into config/openziti/identity.json, then
set "serverBind": { "enabled": true, "serviceName": "openziti-mc" } in the config/openziti.json file.
Client Setup
For each client running the OpenZiti MC mod, ensure the client identity is enrolled and then drop the enrolled client
identity into config/openziti/identity.json.
Using the Mod
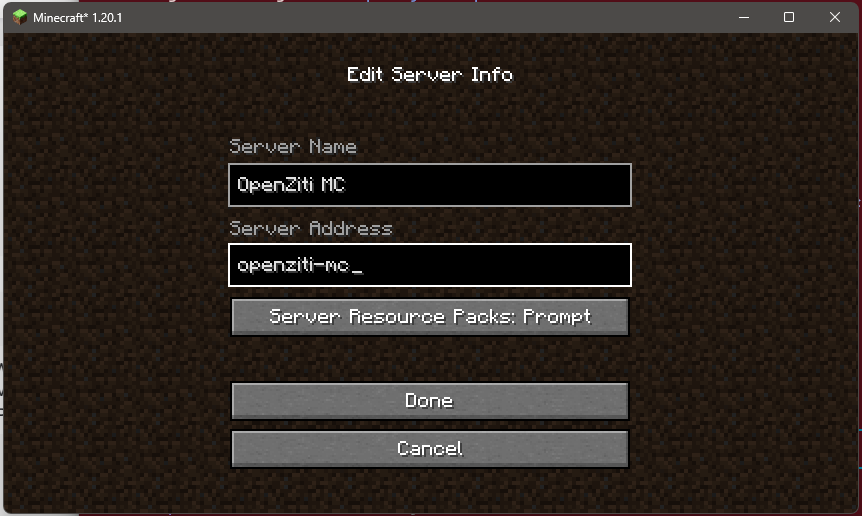
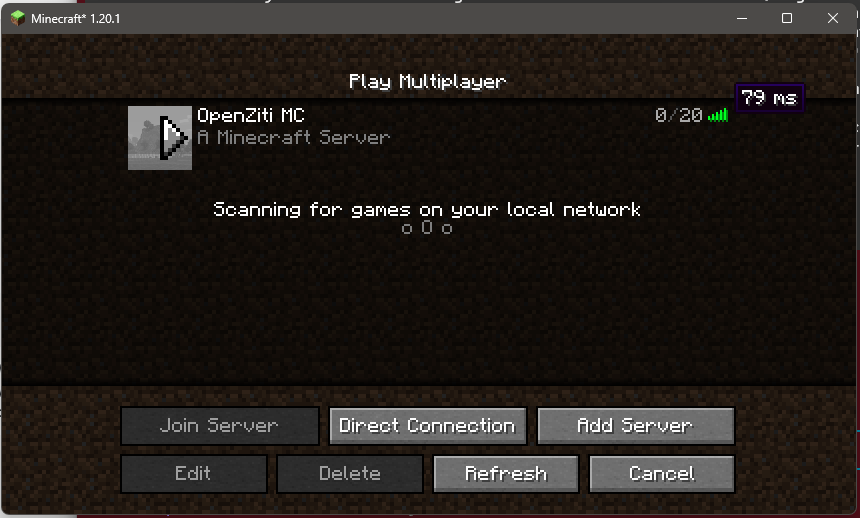
After starting Minecraft, choose: Multiplayer -> Add Server -> Server Address openziti-mc -> Done -> Join.
Additional Information
For additional information or more details see the project’s main page on GitHub at
https://github.com/dovholuknf/openziti-mc/. There you’ll find a full step-by-step (controller + identities +
policies + dev runs) guide as well in the SETUP.md.
Limitations
- This release targets MC 1.20.1 only. NeoForge support is planned for a future MC bump.
- The OpenZiti SDK and Kotlin standard library are bundled, so the jar is around 28 MB. Larger than most utility mods, smaller than most content mods.
- Annotation-processor warnings about Netty mapping targets are cosmetic; they do not affect runtime behavior.
Architecture
For a technical deep-dive (Netty channel-factory hook, the smuggler InetSocketAddress pattern, the three Mixin classes, the ZitiContext warmup wait, the dial-retry loop) see
BLOG.md in the repo.
Credits
- openziti/ziti — the OpenZiti overlay network
- openziti/ziti-sdk-jvm — the SDK whose
ziti-nettymodule made this a small mod instead of a large one. - vgskye/e4mc-minecraft-architectury — the smuggler-InetSocketAddress pattern and the Mixin shapes for
Connection/ServerConnectionListener.
Apache-2.0 licensed. Source at github.com/dovholuknf/openziti-mc.
常见问题
OpenZiti MC 支持哪些 Minecraft 版本?
OpenZiti MC 支持 Minecraft Java 版 1.20–1.21.10,共 18 个版本,可用的加载器:Fabric。下载时注意选择和你游戏版本一致的文件。
OpenZiti MC 怎么安装?
先用 PCL2 或 HMCL 启动器安装对应版本的 Fabric,再把下载的 .jar 文件放进游戏目录的 mods 文件夹,重新启动游戏即可。开启了版本隔离的,mods 文件夹在 versions/版本名 下面。
评论
登录后评论和评分